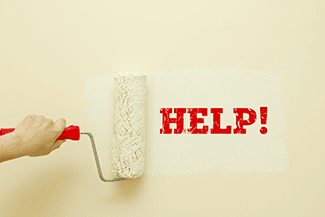
Painting Tips, Tricks & Techniques from the Pros
There is not much that can as easily refresh the look and feel of your home as a fresh coat of paint. But before you slap a coat of paint on the wall, there are a few things to consider and do to ensure the paint will look its best and last as long as intended.
Rely on the Professionals
 Once you have decided what to paint and the color, go to the paint store, not the paint department in a home improvement store, but an actual paint supply store such as Sherwin-Williams. The staff there knows paint because that is all they do. A paint professional will advise you on the kind of paint (flat, gloss, semi-gloss, etc.), the tools you will need, and how to properly apply that specific type of paint.
Repair & Prepare Before You Paint
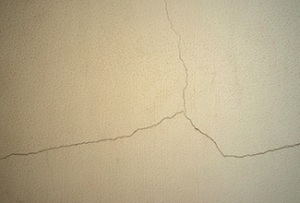
If you have lived in your house for at least a few years, there are likely a few dings or cracks in the walls. Whether from the kids, pets, or a wrong turn with the vacuum, you must repair the damage first. Painting alone will NOT repair them. Even if you don’t have damage, the walls must be cleaned otherwise, you will be painting over dirt and grime.
The quality of any paint job depends on how well you prep the walls.
Sherwin-Williams explains in their Pro Tip resource, Know Your Substrates, that paint failure is generally a symptom of poor surface preparation. Thoroughly cleaning the surface assures proper bonding of the paint and helps you get the most from your topcoat. Other considerations:
Old paint:
Make sure the glossy surfaces of old paint films are clean and dull before repainting.
Wood rot:
 Fix the water or moisture problem before painting. You may want to call a carpenter.
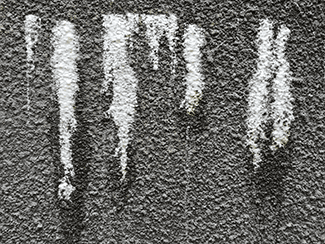
Efflorescence:
If you see white fluffy deposits of salt crystals on the surface, scrub them off before painting.
Mildew:
If there is the appearance of dirt even after washing, chances are there is mildew on the surface. Scrub with a solution of one part bleach and three parts water. (Wear rubber gloves and eye protection.) Allow to stand on the surface for 10 minutes, then rinse thoroughly. Repeat as necessary. Allow the surface to dry for 48 hours before painting.
Weather:
Never paint immediately after a rain, when rain is predicted, or during foggy weather. As a general rule, humidity should be no more than 85 percent. Avoid painting when temperatures rise above 90° F or fall below 50° F unless the products are designed to be used under those circumstances.
Taking preparation further, Rosie suggests the following steps:
Clean the walls.
Wearing a pair of big, thick rubber gloves and eye protection, wash the walls with TSP (trisodium phosphate) cleaner and rinse them with clean water. TSP is available at most home improvement stores.
 Rosie has used TSP for clean up in these situations for years. Follow the instructions on the product as it can irritate your skin. Make sure you rinse the wall well to get all the product off the wall prior to painting.
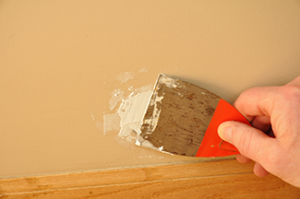
- Inspect the drywall for flaws. Once walls are sparkling clean, take an inch-by-inch survey of their surfaces. Check for scratches and ink stains.
- Repair damage. Seal the ink stains by spray painting a primer called KILZ, just on those spots. Cover imperfections with a simple application of drywall mud. Minor damage such as small screw or nail holes can be filled with spackling paste, caulk, or even toothpaste for a tiny hole. Let the patch dry and sand or wet sponge it before repainting. See below for more drywall repair details.
- Apply a colored primer. If your walls have paint on them, you only need to spray the primer over the holes and scratches you are repairing. If you’re painting never-painted walls, though, you’ll need to prime them. Because most paint primer is white, ask your paint store to add a little bit of umber (a clay pigment) until the primer takes on a slightly gray color. The gray-tinged primer will accentuate any imperfections, giving you one final chance to make it perfectly smooth before applying the paint. Once you paint over the primer, you will clearly see any areas where the paint was rolled on too thin.
- Inspect again. Hold a large spotlight a foot from the wall. The light will highlight little imperfections in the texture. Rub a thinned-down mixture of drywall joint compound over the flaws, using an 8 or 10-inch drywall knife. Let it dry, re-prime just those spots, and then paint.
Watch this short video to see how the prep work is done.
Drywall
Rick Thompson, Thompson Drywall, a Rosie-Certified Partner, suggests that if you are touching up small repairs like nail pops, buy a small tub of all-purpose joint-compound and some cheap plastic drywall knives. Apply a couple of tight coats (let dry in between) to all the dings and nail holes. Then take a lightly wet sponge and gingerly sponge the edges so that it blends into the texture. Be careful not to wash the mud out of the repair. Also, if there is a ding in the bullnose corner bead, put a small amount of mud on the corner of the knife and just follow the radius of the metal bead and fill it in. That will also take two coats too.
 Repairs to areas of major water damage are best left to the pros. You never know what kind of damage is lurking behind that drywall. There could be mold, which should be left to a professional mold remediation expert.
The age and condition of the paint on your wall and stored paint from when it was applied, are really the key factors in how quickly you will finish drywall repair projects. But it’s the quality of the patchwork that is critical to restoring drywall walls to look like new. The paint will only look as good as the surface it’s applied to. A poor patch with a poor texture match will stand out more than you’d expect, even with the best paint coating.
Click Here to learn how to repair drywall damage.
Stucco
Use a power washer to remove dirt, loose paint, and all signs of efflorescence from the walls.
For tough spots, add diluted TSP to the power washer’s secondary pickup tube.
Use an air compressor to clean out large cracks. Remove loose material from within the crack with a one-inch putty knife.
 To repair cracks, especially those larger than 1/16 of an inch, use elastomeric caulk. It has great elasticity, so it will move with cracks if they widen, and it will help prevent water from seeping through the cracks.
Do NOT paint an entire wall with elastomeric paint. It is so watertight that it prevents the walls from “breathing.” If water manages to find its way into or behind your walls, it will get trapped there and cause bubbling paint and mold growth.
Use 100% acrylic paint to prevent problems from water damage.
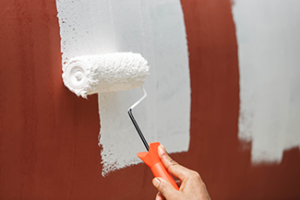
Use a good-quality heavy nap roller and work the paint into every nook, cranny, and pinhole of the stucco. Now is not the time to scrimp on the amount of paint you apply. Keep your roller wet with paint and apply it liberally. You will see professional painters spray-painting homes, but that’s not a technique for amateurs.
Stucco alone is not waterproof. Paint stucco at least every five to seven years to keep it protected.
Extra Tips
- Cover the floor from corner to corner with old sheets or plastic tarps and carry the bucket around with you. Keep it within a few inches of the wall you’re painting.
- Using a roller, paint a big “W” on the blank wall, and then paint a couple of big “X”’s over top. Fill the gaps by rolling paint on in vertical lines.
- If you want a higher sheen in the bathroom, mudroom, and kitchen, use a semi-gloss or satin finish rather than a high gloss. Roll on flat in the bedrooms, living areas, and hallways. Flat paint hides imperfections like puttied-over nail holes, better than glossy.
- Use high-quality painter’s tape to protect the ceiling when painting the edge of the walls, and vice-versa. The tape will also help keep paint off windows, woodwork, trim, and anything you don’t want to get paint on.
- Before applying flat paint on high gloss walls, rough up the surface with sandpaper or apply a bit of TSP.
- If you are staining wood and it is possible, bring a sample of the wood to the paint store so a professional can match it with the best stain for its wood type and grain.
Do this important prep work, and you’re going to see a richness and depth of color on that wall like you never dreamed possible.
###
Podcast
Preparation is the key to a great paint job; starting with investing in the right tools and a great paint product. Paint failure is generally due to poor surface preparation. We discuss the tips and tricks to prepare drywall, wood, even block cement walls, for painting. Rosie has suggestions to keep your honey happy for the Super Bowl. Plus, can paint cover cigarette/cigar smoke on the walls? It goes deeper than that!
Photo Credit
- Shutterstock
Related Content
- DIY FAQ: How Do I Prepare My Walls For Painting?
- DIY FAQ: Drywall Damage Patch & Repairs
- DIY FAQ: How Can I Paint My Interior Walls Like A Pro?
- DIY FAQ: Refreshing Dull, Chipped, and Damaged Paint
- DIY FAQ: How Can I Keep My Stucco House Looking Nice Year After Year?