A chipped tile can be a safety hazard. You can cut your foot on the sharp edges or trip over it. Chipped and broken tiles must be repaired.
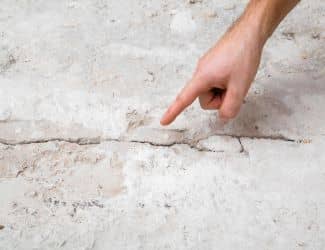 A cracked tile floor is invariably a cracked concrete floor that has telegraphed through to the tile. Telegraphing means the flooring will take on any imperfections, protrusions, or undulations in the substrate (foundation). It is often a result of poor installation and maintenance. Or perhaps someone dropped something really heavy – oops!
No matter how it happened, let’s get that broken tile repaired/replaced:
How To Fix It
There are several ways of handling telegraphing. The best way is to remove all of the cracked tiles plus an additional row on each side of the cracked tiles. Completely clean the concrete floor, exposing the crack underneath the tile. Most professional floor covering wholesalers and retailers carry a floating bitumen membrane (usually 6″-8″ wide, sometimes 12″ wide) that you apply over the top of the crack. It serves as a cushion and shock absorber between the tile and the crack itself. Then you simply re-spread the thinset mastic and relay the tile and grout as usual. This process, called slip-sheeting, has a much better success ratio in solving the cracked tile problem than other options you may be tempted to try.
If you have chipped tiles, any good epoxy glue-type product will repair ceramic or Saltillo tile (if you still have the chipped piece). However, refinishing the surface to match the original tile can be tricky. You may want to try using a similar color of auto body paint to make the blemish disappear.
If you need to replace the tile and do not have extra from the original installation, and it has been many years since it was installed, you may have trouble finding a perfect match. Once you have selected the right color and texture (or as close as you can), be sure it is the same size as the one(s) being replaced. Buy extra tiles so that if other tiles break down the road, you will have the best match to at least the one(s) you just replaced.
Tools Needed for Removing & Replacing Tile:
 tile
tile- utility knife
- hand grout saw
- cold chisel
- hammer
- eye protection
- work gloves
- sponge
- clean rag
- floor adhesive
- rubber float
- bucket
- level
- water
- grout
Steps For Removing & Replacing Tile:
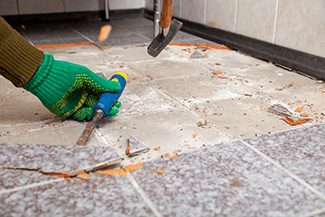
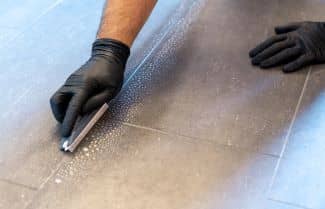
- Remove the unrepairable tile by cutting the grout around it with a utility knife or hand grout saw.
- Carefully chip out the tile by setting the cold chisel in the crack. Hit it with the hammer until the cold chisel can scoot under the tile. Be sure not to damage the surrounding tiles and grout.
- Remove any adhesive that remains on the floor with a damp sponge.
- Thoroughly clean the area, making sure all the bits of adhesive and tile are cleared away.
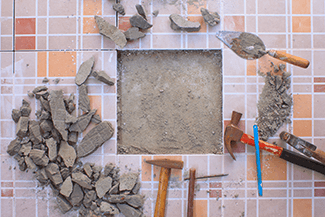
- If the tile is cracked because the foundation is cracked, apply the floating bitumen membrane first. Then liberally apply the tile adhesive to the area where the new tile will be placed. Spread it out evenly using the flat side of the trowel. Then use the notched side to make grooves in the adhesive.
- Place the new tile on the surface, and make sure it is level with the rest of the floor.
- Remove excess adhesive from the tile and the surrounding area. Let it dry for a few hours.
Grouting
There Are Three Major Types of Grout:
1 | Un-sanded / Non-sanded Grout
Made from mixing cement, water, and non-sand particles, this type is used in grout lines smaller than an eighth of an inch wide. Because it does not have abrasive particles, this grout is great for natural stone, such as polished marble and ceramic tile on shower floors and walls.
2 | Sanded Grout
A cement-based mortar that is ideal for grout lines that are larger than an eighth of an inch, it is ideal for ceramic and stone tile. Because it is absorbent and may attract dirt; it should be sealed.
3 | Epoxy Grout
Strong, durable, and versatile, epoxy grout is made by combining epoxy resins and hardeners. Impermeable to liquids and moisture, it is likely to be used for backsplashes, kitchen floors, and bathrooms. We love it, as it doesn’t need to be sealed, but because it is epoxy-based, it is tricky to use.
To find a grout that matches what is currently in place, start by deep cleaning the grout around the nearby tiles with an oxygen bleach powder mixed with water. Grout swatches are available at flooring stores. Match the swatch to the existing grout and buy more than needed. That way you will already have it on hand if you need to replace grout in other areas later.
Steps For Grouting Tile:
- Following the grout manufacturer’s instructions, mix the grout.
- Grout the tile into the floor using the rubber float. Apply the grout into the cracks diagonally.
- Drag the round handle along the new grout lines for a clean, finished appearance.
- After the repair is finished, clean the tile, and seal the grout. Click here to learn how to clean the tile and seal the grout.
Weekly sweeping and mopping of the floor, regular inspection of tile and grout, and resealing will keep your flooring in good condition for a long time.
###
Home Maintenance To-Do | #RepairingCracked&ChippedTile
PODCAST
Replacing cracked or chipped tile can be a DYI task. We get you thru the steps to get the job done. Arizona Game And Fish Urban Wildlife Specialist Darren Julian discusses what can done about wildlife intrusion like coyotes in neighborhoods. And callers need help with drain pipe debris, shower drain issue and tips for January is Getting Organized Month.
Podcast Archive With Expanded Content and Resources
PHOTO CREDIT
- Shutterstock