
SELECTING THE RIGHT NAIL FOR THE JOB
Nail Selection:
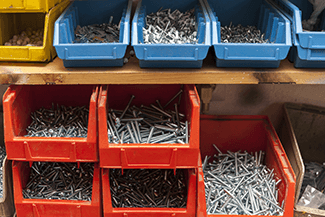
Nails are the most common and easy to use metal fastener; proper selection of length, diameter, head type and coating is critical.
Nail length is designated by the letter “d” and is referred to as penny. A 2d (or two penny) nail is one inch long, every additional penny represents an additional 1″ of length.
For example a 6d nail is 4 pennies larger than a 2d nail and measures 2″.
For rough carpentry work such as attaching wood studs to floor plates, constructing header or corner posts we use a 3″ nail; this is referred to as a “16 penny common”. Nails can be generally purchased between 2 and 20 penny. Any size over 20d (4″) aren’t nails anymore, they’re called spikes and you order them by the inch, not the penny.
The term “common” nail refers to the diameter of the nail shaft, it is the heftiest of the nail family. In order of decreasing size of the cross section of the nail shaft you’ll find the box, casing, finish and brad nails.
Any and all of these nails can be made of iron, steel, bronze, aluminum or stainless steel, and can be optionally coated with zinc, cement, resin, or vinyl. Nail shafts can be smooth, serrated or spiraled.
For nailing 2×4’s together use 16 penny vinyl coated common sinkers. For toe nailing use 8 penny vinyl coated box nails. The Box nail shaft diameter is smaller than a common nail, making it less apt to split the wood stud or plate when toe nailing.
Nailing:
Using a 24, 26, or 28 ounce framing hammer or rigging axe, grip the end of the handle, do not choke up on it as if it were a baseball bat you were going to bunt with. If you are right handed your left heel rests on the stud, your left toe rests on the plate. The material needs to be on a flat stable surface. Start your nail with a firm tap of the hammer, move your left hand away and with full swings sink the nail in 2 or 3 blows. The key to not missing is never take your eyes off the nail! Drive 3 nails per stud, make sure they are not perfectly parallel, if each is slightly off set it will multiply the holding power greatly.
For toe nailing use an 8d box nail, come back from the end of the stud 1/3 the length of the nail. Set the nail at approximately a 60 degree angle to the base plate and drive till nail head touches the stud. No need to pound nail head into a counter sink position. Use 2 toenails on one side of the stud spread apart and center one toenail on opposite side of the stud. In this manner you have the toenails working together to make a stronger joint and the last centered toe nail can be used to drive the stud to perfect alignment of layout if needed.
NOTE:
It is my personal experience that the safety warnings getting plastered on everything from baby pacifiers to coffee pots usually go unheeded and ignored. Please do not disregard this safety notice:
ALWAYS WEAR SAFETY GLASSES WHEN DRIVING NAILS!
Need the tools for the project?
We’ve got you covered! Check out our selection of Safety Products as well as Hand Tools and more, on the Rosie Estore!