Top Five DIY Articles of 2021
As the Rosie on the House team wraps up 2021, we reflect on the year it was . . . and it was another year of spending more time at home for many. Before looking forward to 2022, let’s take a look at the most popular DIY articles of this year. There is no rhyme or reason as to how they stacked up. But then there was no rhyme or reason to 2021.
#1 | What Is The Correct Mortar Mix Ratio For Masonry?
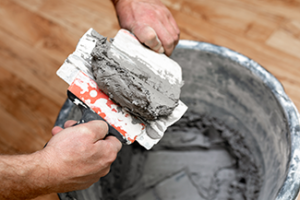 This one was by far the most visited article. We received many calls in the office and on air about mortar mix this year.
The experts and I agree that with pre-mix bags available, unless you are on a major jobsite with at least a dozen masons working, it’s just not worth mixing yourself. However, if you are inclined to do so, our friends at Superlite Block have provided the industry standard directions below.
There are a variety of mortar mixes that the mason contractor can mix up, depending on the type of material that is being installed:
Type M (2500 psi)
Type S (1800 psi)
Type N (750 psi)
The different types are achieved by varying the ratio of Portland Cement, Lime and Sand. Type S mortar is the most common for the Arizona market so we will use this as the basis for our comparisons.
There are three primary ways to make mortar:
- Portland Cement, Hydrated Lime and Masonry Sand
- Masonry Cement and Masonry Sand
- Pre-mixed Mortar
The Portland Cement, Hydrated Lime, Masonry Cement and Pre-mixed Mortar are available in bags, the Masonry Sand is generally available in “bulk quantities” that are delivered by a truck or can sometimes be purchased in big “super sacks” from the big box retailers.
- Portland Cement, 94# bags
- Lime, 50# bags
- Masonry Cement, 70# or 78# bags
- Pre-mixed Mortar, 60#, 80# or 94# bags
- Masonry Sand, Usually a pile of sand is delivered to the jobsite by a dump truck. The sand is measured into the mixer by means of a standard square point shovel that is “mounded full”. This is referred to as a “shovel of sand”
#2 | Is Replacing A Showerhead A Do It Yourself Job
 Yes! Changing out your showerhead can be a do it yourself job and we are going to help you do it.
Luckily, it’s pretty easy to replace a showerhead. Even if your current showerhead “works just fine”, upgrading is a job that can save you money on your energy and water bills. With an upgraded showerhead, you can cut your water use anywhere from 25 to 60% by using less less water, thus using less energy on hot water heating. Maybe it’s time to replace that water-hogging showerhead with a new model.
Is Your Showerhead Wasting Water?
If you’re still using a showerhead that you bought before 1992 — when all new models became low-flow — you could benefit from switching. Here’s a test to learn whether your showerhead is a water-hog:
- Place a bucket or other container that’s marked in gallon increments under your shower head.
- Turn on the shower at the level you usually use to bathe.
- Time how long it takes to fill the bucket with one gallon of water.
- If it takes less than 20 seconds to fill one gallon, consider switching to an updated low-flow showerhead, perhaps one from this decade.
Here’s How To Replace Your Showerhead: …
#3 | What Are The Pros and Cons of Kool Deck Vs Acrylic-Pool Deck vs Pavers
Kool Deck VS Acrylic Pool Deck
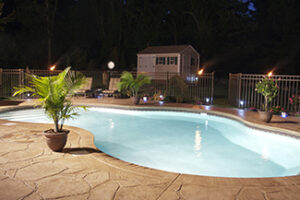 It used to be that every backyard swimming pool looked just about the same. Everybody relied on the same product to keep the deck around the pool comfortable under bare feet: Keystone Kool Deck. Kool Deck is a premium, trademarked product, not to be confused with cool deck which is a common term that is used to refer to textured or stamped overlays for pool decks. In fact, if your pool deck was built before the mid-1990s, it’s probably covered with that familiar mottled-beige concrete.
Today we have many material and design options to choose from. Before selecting a pool deck product there are many things to consider:
- First and foremost, is it safe and slip-resistant when wet?
- Is the material coarse, bumpy, or uneven?
- Is it heat-reflective? Will it remain cool on hot days?
- Will it blend well with other paved or hardscaped areas in your yard?
- Is it resistant to algae, chemicals, acid, mold and mildew, and frost?
Is it compatible with chlorine and/or salt water systems?
Let’s break them down.
Kool Deck
Keystone Kool Deck was invented by Tucson company, Mortex, in 1962 for use as a surface coating over concrete swimming pool decks, walkways, and patios. Applied to freshly poured concrete, Kool Deck creates a colored, textured concrete surface that the manufacturer says is as strong as the base concrete.
“Kool Deck is almost non-existent in our industry now,” said Manny Sanchez, president of the Pool & Hot Tub Alliance, Southern Arizona Chapter. “If somebody chooses a surface comparable to that, it is more than likely going to be an acrylic overlay.”
Kool Deck Pros:
- Lowers the surface temperature of concrete by around 20 degrees– more than any other deck material.
- Withstands thermal expansion and contraction better than concrete.
- Is fairly easy to clean.
#4 | What Safety Precautions Should I Take With My Gas Fireplace
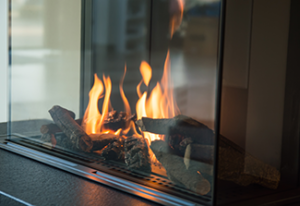 Rosie urges anyone who converts a wood-burning fireplace to gas to take precautions to protect your family and your home from harm; practice good gas fireplace safety.
Whenever you use a gas appliance in your home, you run the risk that excess carbon monoxide will poison your family or that an untended gas flame will cause a fire.
You can prevent those tragedies by studying your manufacturer’s gas fireplace safety instructions and by following Rosie’s tips for enjoying your gas-burning fireplace without incident.
For all gas-burning fireplaces
- Hire a licensed contractor to convert your wood-burning fireplace to gas. Working with a gas line or a propane tank is a job for an experienced professional, not a do-it-yourselfer.
- Make sure your contractor installs an oxygen-depletion sensor in your gas fireplace. This device, sometimes called a “safety pilot,” automatically shuts the gas off if the temperature in the fireplace gets too cold or if too much carbon monoxide builds up.
- o Insist on having one, even if your gas fireplace is vented.
- 3. Check your county and city building codes before installing a gas fireplace to learn about restrictions on where you can place a gas fireplace. Ask your contractor to get a building permit before installing the gas line or propane tank that will fuel your fireplace.
- 4. Have your chimney cleaned by a professional chimney sweep before you fire up your gas logs for the first time.
- 5. Install carbon monoxide detectors on every floor of your house.
#5 | What Are Some Tips For Hanging Drywall
Hang Ceiling Drywall First
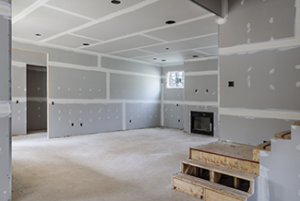 When hanging drywall, always hang the ceiling first. This is the hardest drywall to hang, so get a partner and go slow. Large cracks due to misaligned sheets are hard to repair because the extra mud required to fill them will constantly fall out and drop to the floor (or worse, down the back of your neck!).
Hang The Walls Next
When hanging the drywall on the walls, always hang the top sheet first. Raise a sheet tight to the ceiling and secure it with a drywall nail at the top and bottom at each stud. Complete the top row throughout the room before proceeding to the bottom.
Measurements
When hanging the bottom sheet, cut the drywall to fit around electrical j-boxes and plumbing rough-ins. Measuring from left to right, determine (to the nearest 1/8 inch) the horizontal measurements on the wall to the box location. Pulling from left to right, mark the exact location on the top edge of the drywall. Using a four-foot drywall square and a pencil, transfer these marks to the face of the drywall. For your vertical dimensions, do not measure up from the floor. Instead, measure down from the bottom of the drywall that you have already hung. Transfer this measurement, measuring from the top down. You should now have a layout of the material to remove using a drywall keyhole saw, cut the drywall on your lay-out marks to accommodate the junction box.
Who Will Take the Crown in 2022?
Our articles remain on our website, with some updates as needed. Who knows what the next year has in store or what the hot DIY projects will be? If you are not already signed up to receive our weekly eNewsletter with a new DIY article and blog, visit www.RosieOnTheHouse.com, scroll to the bottom and subscribe!
If you can’t find a particular DIY How-To, please contact us. It may be coming up soon!
Home Maintenance To-Do | #LookingBack on 2021
###
Photo Credit
- See Original Posts
RELATED CONTENT
- Rosie eStore: Custom Rosie on the House Tools Every Homeowner Should Have
- Blog: How Much Time Will That DIY Project Take?
- Blog: How To Paint An Arizona House
- DIY FAQ: Drywall Damage Patch & Repairs
- DIY FAQ: Four DIY Projects That Help Pay For Themselves
- DIY FAQ: Tips For Setting Up Your Drip irrigation System
- Search our DIY Home Improvement Database & Library
- Weekly Podcast: Subscribe for free!