Demolition
Demolition work sounds like fun, and it can be. However, there is a difference between tearing something down and removing it!
Taking things apart carefully, such as a non-bearing wall, removing cabinets, counters, and backsplashes, can help to avoid unnecessary damage to adjoining surfaces you don’t intend to replace or repair.
Rosie Certified handyman, Fred Willsher of The WILLSH Corporation, refers to this part of the process as “surgical” removal. Here are some of Fred’s pro tips to follow before and during the demolition process:
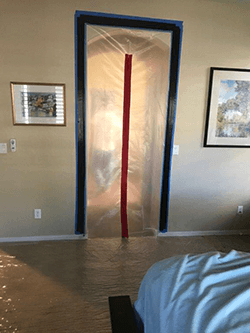
- Cover up and protect | If your home was built before 1980, start by testing for asbestos and lead. Call a professional to do the demolition work if either of these are present. Protect all the surrounding surfaces that are not intended to be replaced before you start the demo. This means removing or covering furniture, flooring, walls, and rooms. Rosen paper and blue tape and plastic covers for openings to other spaces are key tools of protection. If you anticipate a lot of dust, and you should, cover supply and return vents in the work area to prevent dust from spreading throughout the rest of the house or damaging your air handler. Fred says to be sure and tape down your corners!
- Start the demolition with a razor knife, not a hammer | To remove drywall from one wall but not an adjacent wall or a backsplash from an existing wall, start by cutting through the drywall tape and compound to avoid tearing the drywall paper from an adjoining surface.
- Controlled descent | Fred says, “Don’t let items drop! Always have a plan to safely lower and remove heavy items like drywall, studs, and cabinets.”
When done correctly, proper demolition will make the new work install go smoothly.
Concrete
Here is a unique tip for mixing small batches of concrete that Freddie developed over the years. This method mixes one 60 or 90 lb. bag of concrete at a time. If your job requires less than 2 or 3 cubic yards (the minimum order from most Redi mix companies), this tip is for you!
*For reference, one cubic yard equals 80 square feet, 4 feet deep.
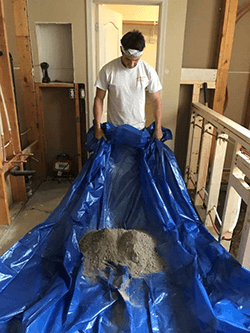
Begin with a 10×12 tarp and place the sack of concrete in the center. Slice the bag open and remove the paper. While one person grips the tarp corners and lifts it, pour water on the “upside” of the concrete pile. The second person grabs the other side of the tarp and lifts it, moving the dry mix into the water. Repeat these steps, back and forth, until the concrete consistency is what you want. You may have to play with the water-to-mix ratio a bit. The process should take just a few minutes and is easier than mixing with a shovel or hoe in a wheelbarrow.
Hanging Doors & Fixing Sagging Doors
Installing a new door in an existing opening has been made easier through the advent of the pre-hung door. These are doors that are already in a frame with hinges in place. This allows for simpler installation where all you need are shims, a 6-foot level, and a finish nail gun or finish nails to attach the door jamb to the existing framing. Unless you have journeyman-level carpentry skills, we don’t recommend you try installing a door from scratch.
Sometimes the door frames will come with the molding or trim already attached to one side. Installation is completed by leveling the door and tacking the trim to the existing framing. All that is left to do is to secure the door jamb to the frame.
Often, Fred is called out to fix sagging doors that close improperly or not at all. Taking the existing screw out of the center of the hinge (about a ¾” screw) and replacing it with a 3″ deck screw installed through the jamb into the framing will clinch the door sufficiently to open and close properly. A note here: an impact drill, or powerful variable speed drill, is the best tool for getting that 3″ screw sunk in as deep as needed.
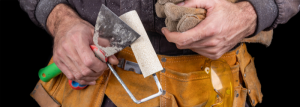
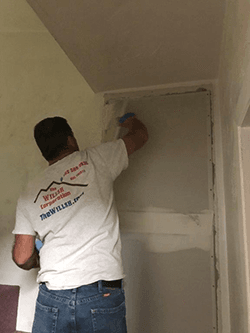
Drywall Patching
Fred’s tricks to work with drywall:
- Always stack your drywall in an open space with the 4’–0’ edge vertical and the 8’–0’ horizontal.
- When cutting drywall start with a 4″ T Square or 4″ level. Score drywall with a new blade in your utility knife. Cut the finish side (white side), snap the drywall, and score the backside to finish.
- To hang drywall, use 1 5/8 coarse thread screws and do not go through the paper as it will break the gypsum.
- The WILLSH Corporation uses self-adhesive mesh tape when taping the joints.
Now you are ready to repair the damaged drywall.
- Clean any dirt or dust from the area and place the sticky side of the tape (sometimes both sides are sticky) on the wall to cover the patch.
- Use drywall compound (AKA drywall mud) to cover the tape and hole, smoothing it out as much as possible with a drywall blade to complete the first coat.
- When dry, lightly sand or use a wet sponge to further the smoothness and prepare to put on another coat if needed.
- Matching and blending your repair with the surrounding texture can be challenging. It will help to determine which drywall texture is on your wall. Common finishes are orange peel, knock down, or smooth.
- Using an extra piece of sheetrock try matching the drywall texture on your wall. Make your best effort to copy what is there, then stand back and look at your work. If you have texturing skills, great. If you are not happy with the results, you may need a professional to touch it up.
Fred will sometimes use a product called “hot mud.” This compound dries very quickly and is used by skilled pros. We don’t recommend trying it your first time.
Extra Tips
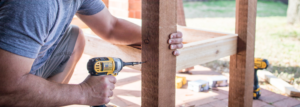
Framing
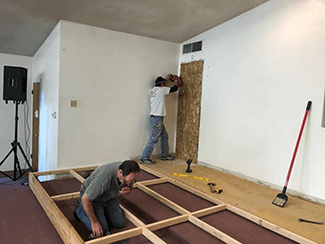
When you cut a piece of framing, be it a stud, plate, or joist, you will make a line with your framing square as you measure for a cut. Always leave the line on the part you want to keep, as it is easier to make a board smaller than larger.
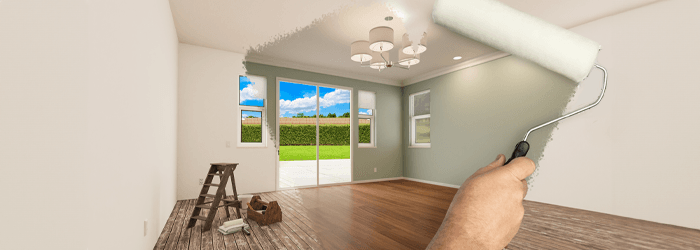
Painting
When painting an area, use a 5-gallon bucket with a mesh grate attached to the inside of the bucket to remove excess paint from your roller instead of a roller pan. Even if you only use a gallon of paint, this tip keeps the area cleaner. You don’t have to stop and refill a pan. When working on a ladder, the bucket is easier to hang than a pan. Oh, and Fred likes not having to bend over so much!
Paint Brushes
- Use a 3″ angled Purdy Brush for more professional results when cutting in.
- Keep the cardboard sleeve. When finished with painting for the day, clean the brush thoroughly. Always store the brush in the sleeve to help hold its shape.
With these handy tips your work will look more like a pro did the work! If you need a handyman, consider calling The WILLSH Corporation. Fred and his son Freddie offer numerous services for maintaining, improving, and repairing your home.
###
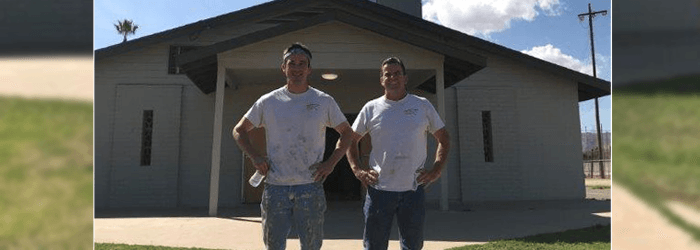
CONTENT PARTNER | The WILLSH Corporation
A Native of Arizona, Fred Willsher has been in construction for 36 years and has served Valley homeowners as The WILLSH Corporation since 2013. Fred Willsher and his son, Freddie Wilsher, offer numerous services for maintaining, improving, and repairing your home such as Demolition, Framing, Drywall, Finish Carpentry, Flooring, Painting, and more!
PODCAST
Fred and Freddie Willsher of The WILLSH Corporation are pros with handyman demolition, concrete, drywall repair, framing, painting and more! It’s the extra steps they take that have their clients, old and new, calling them back for their services. DIY’ers can learn plenty from their techniques.
Podcast Archive With Expanded Content and Resources
PHOTO CREDIT