Reviving & Repairing Interior Paint
Have the kids moved out? Is it time to paint their rooms the colors you want? Are their empty walls full of pinholes from their Justin Bieber, Beyonce, and Vans posters? Before  covering their questionable paint colors with your more refined choices, you may need to do some repair work.
Clean the walls. The quality of any paint job depends on how well you prep the walls. Start by pulling on a pair of big, thick rubber gloves and eye protection, and then wash your walls with the cleaner TSP (trisodium phosphate) and rinse them with clean water. This will be the start of the best paint job your house has ever seen.
Inspect for flaws. Once walls are sparkling clean, take an inch-by-inch survey of their surfaces. Check for scratches in the drywall texture (maybe from moving furniture) or ink stains left by a super-creative child. Move a light across the surface. When you find a hole or chip, stick a piece of tape next to it so you will easily find it when it comes time to repair. Use tape. A pencil or pen can bleed through the paint.
Repairing Damaged Walls
Ink Stains
Seal the ink stains in by spray-painting a primer called KILZ, just on those spots. Cover imperfections in the drywall texture with a simple application of drywall mud.
Pinholes
Paint alone will not cover pin or nail holes.
Fill pinholes with spackling compound. Apply it with a putty knife, spreading it thinly on the wall. Allow it to dry before lightly sanding using fine-grit sandpaper.
Torn drywall
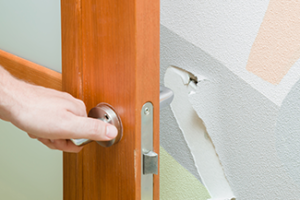
To fix torn drywall cut away any loose paper. Seal the exposed drywall with a stain-blocking primer. This keeps the drywall from absorbing moisture from the soon-to-be-applied joint compound. Wait for the primer to dry, then sand the exposed drywall edges to remove paper nubs. Cover the gouge with a thin layer of joint compound, feathering it out along the wall. If necessary, apply a second coat, feathering it as well. Wait for it to dry and sand it smooth.
 Tip: When using joint compound, cover it with primer before painting to prevent “flashing” which occurs when joint compound absorbs the paint, dulling the finish.
Scuffs
Use a duster or microfiber cloth to remove dust and debris that has dulled the paint’s appearance. Dusting will make cleaning more effective.
Joe Campbell, Arizona Painting Company, a Rosie-Certified Partner, suggests removing scuffs with a wet cloth or wipe. Depending on the paint finish, some marks will come off easily. If not, use mild dish soap. For stubborn stains, ammonia, vinegar, or baking soda diluted with water will work in most cases.
Never mix ammonia with bleach. The fumes are toxic and the mixture will destroy the paintwork. Avoid using bleach or coarse scrubbing brushes. Open the windows during and after cleaning for ventilation.
If you encounter mold, don’t mess with it. Hire a professional mold remediator to remove it.
Priming
Apply a colored primer. If the walls already have paint, spray the primer over the holes and scratches you repair. If you’re painting never-painted walls, though, you’ll need to prime them. Most paint primer is white, so ask your paint store to add a little bit of umber (a clay pigment) until the primer takes on a slightly gray color. Once the gray-tinged primer is on the wall, it will accentuate any imperfections. This will give you another chance to make it perfectly smooth before applying the paint. And once you paint over the primer, you’ll be able to clearly see any areas where the paint has rolled on too thin.
Painting
 Before you apply the paint, hold a large spotlight a foot or so from the wall. Put your nose that same distance away from the wall and allow the light to show you any last little imperfections in the texture. Rub a thinned-down mixture of drywall joint compound over the flaws, using an eight or 10-inch drywall knife. Let it dry. Then re-prime just those spots before painting.
Touching Up Paint
“One of the biggest and most common mistakes when it comes to retouching paint is selecting a different shade than the original paint,” said Campbell. “This could make the situation worse by painting over an imperfection with mismatched paint.”
Campbell recommends using the original paint color and tool used to put down the original paint coat. If a roller was used, then use that for the touch-up. The same goes for paintbrushes, sprayers, and so on. This will help the paint blend. Another trick is to dilute the paint slightly with water for a seamless blend. This will make the touch-up less noticeable since thinner paint looks nicer than a patch of thick paint. Stir the paint thoroughly, especially if it has been sitting in the garage or other non-conditioned storage closet for a long time. You want the paint to be as smooth as possible for a nice, clean look once it dries.
Applying A New Coat
Select a flat paint for repaired walls. It hides imperfections like puttied-over nail holes, better than glossy.
Use high-quality painter’s tape to protect the ceiling when painting the edge of the walls, and vice-versa. It’ll also help to keep paint off of windows, woodwork, trim, and anything you don’t want the paint to get on.
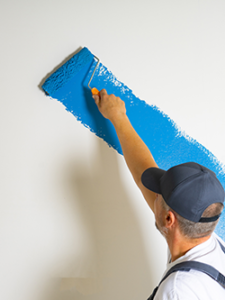
Don’t paint straight, vertical lines. You will wind up with visible lines that show where one stroke left off and the other began, and the sheen on the wall won’t be consistent. Instead, using a roller, paint a big “W” on the blank wall, and then paint a couple of big “X”’s over top. Fill the gaps by rolling paint on in vertical lines.
Use a cheap roller, get cheap results. Invest in a good roller that will apply the paint evenly and last beyond this job.
If the kids move back and in tow with their kids, let them fix any new damage.
Home Maintenance To-Do | #PaintCondition
Podcast
Weekly To Do Tips on preparation before painting inside your home. We also discuss repairing stains, nail holes, torn drywall paper, washing the walls before primer and your favorite paint colors. Plus homeowner questions on repairing a crack on a quartz countertop, sand in the toilet tank and ridge vents and roof whirlybirds to naturally let heat escape the attic.
###
Photo Credit
- Shutterstock
RELATED CONTENT
- Consumer Guide: Rosie’s Painting Consumer Guide
- DIY FAQ: How Do I Prepare My Walls For Painting?
- DIY FAQ: Refreshing Dull, Chipped, And Damaged Paint
- DIY FAQ: How Can I Paint My Interior Walls Like A Pro?
- Certified Partner: Arizona Painting Company | Phoenix
- Certified Partner: Arizona Painting Company | Tucson
- Certified Partner: Dave’s Adobe Painting Services, Inc.


