How to Remove Different Types of Flooring
Once you have selected your new flooring, it is time to remove the existing. But don’t swing the sledgehammer just yet. Removing flooring is not just a whack, crack, lift, and toss. There are things to take into consideration such as the flooring type, adhesive, subfloor, disposal, and safety.
We will break it down into floor types with the help of Rosie-Certified Partners, East Valley Floors, Inc., Bram Flooring and Mission Hardwood Flooring Company.
But first and foremost, always keep safety a priority. When demoing and removing flooring, always wear closed-toe shoes, long pants, kneepads, gloves, a respirator, and safety glasses.
Carpet
Don’t try to pull the carpet up in one piece. Bram Flooring suggests pulling it up in strips using a utility knife or carpet cutting knife. The blade on a carpet cutting knife is double-sided, thinner, and cuts faster. In the industry, that knife is referred to as the “Bloody Mary” knife. So, be warned!
Start in the corner of the room, pull it up in strips. Five-feet wide is the easiest to handle. Place one on the other and roll up the bundle. Toss it in the back of the truck and take it to the dump.
Do not save the pad to save money. An old pad can have pet stains, dirt, and mildew. You don’t want to put that under the new carpet. “Every carpet mill I am aware of will NOT guarantee their carpet if a claim is submitted if new pad is not installed each time,” says Von Payne, owner, East Valley Floors.
Don’t take the tack strip out if you are putting in a new carpet. If you do, new tack will need to be placed, and you will also pay for the extra parts and labor.
If a new carpet will not be installed, the pull up the tack and nails. Do not use a wood chisel. But use something thin enough to pull it up without damaging the slab. Make sure all the glue is removed otherwise, the installation of another flooring such as vinyl will not lay correctly.
Vinyl
It is important to know the era the vinyl was installed If they are nine-inch squares, Payne notes that they and the glue are almost guaranteed to contain asbestos.
The process of removing sheet vinyl depends on the size of the area. Remove small areas with a floor scraper. This hand tool is available with handles between 12″-48″ long and a 6″-8″ wide blade, though razor scrapers are the best. Six-inch or eight-inch-wide blades work for carpet cushion removal. Use the longer handle tool to scrape the floor with the full force of your weight against the handle. Use the short-handled scrapers for tight areas like toe kicks.
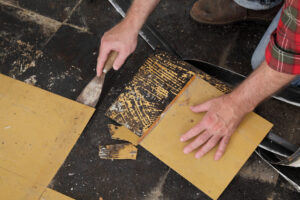
If you have a very large area to remove, rent an electric vinyl remover. It is a heavy piece of equipment with oscillating knife edges that vibrate back and forth across the surface of the concrete. “A-Z Rentals has the best variety and are very competitive,” says Payne.
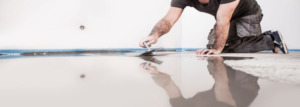
Note that in the photo to the right, the person is not wearing protective gloves. Bad idea! Nearly 100% of the black adhesive (a.k.a. “cutback glue”) contains asbestos,” says Payne. “Homeowners can remove asbestos legally, but traditionally, we licensed, folk are restricted to removing less than 100 sq. ft. Then an asbestos abatement company must be brought in. This is especially important for any home with flooring installed before 1984.”
Tile
When removing tile in the bathroom and kitchen, turn off the water supply before removing a sink or toilet. When removing a toilet, drain the reservoir, remove the bolts, and rock the fixture to break the wax seal. Make an effort remove water before relocating the toilet, otherwise you will have a lot more to clean up. There is a powder that you can pour in the bowl that turns the water to a temporary gel, so it doesn’t slosh out.
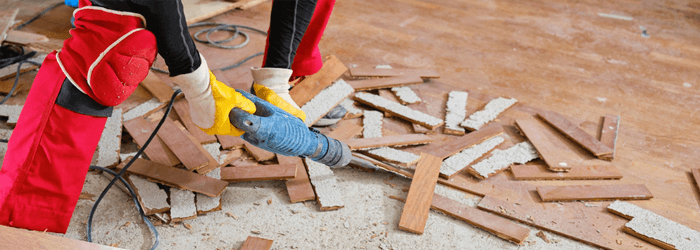
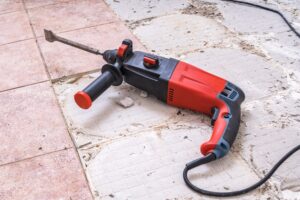
Tile installed around a vanity or other semi-permanent fixture is a good starting point for removal. If the tile is wall to wall, it may be necessary to use a hammer and chisel to break out a tile to create a starting point for prying up tiles. For a large area, rent a jackhammer with a scaling blade. That type of jackhammer is available at The Home Depot. Bram Flooring notes that DeWalt makes a smaller version similar to a hammer drill on steroids that will chip out tile. It uses a two to six-inch scaling blade. The thinset removal is the hardest part, and fractured tile can have razor sharp edges, so be careful!
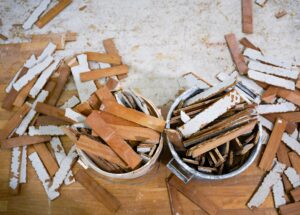
Toss tiles in a trashcan or large bucket and remove them to minimize clutter. Remember that tile can be heavy, and an overfilled waste receptacle will be difficult to haul away. So do it incrementally.
There is a misconception that you can remove tile without creating dust. We feel it’s worth the extra cost to have one of the “dustless” services as it is much, much less dust, but it is certainly not dustless.
We’ve heard over again that people try to remove tiles themselves to save money. In the end, they wish they had paid a professional to do it. It’s a taxing and messy job.
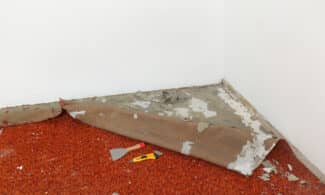
Solid Wood & Engineered Wood
It is important to know the era the wood flooring was placed before removing it. Asbestos adhesives were used until the mid-1980. Therefore, this removal is not a DIY project. You will need a professional asbestos removal company to pull up the flooring and clean the area.
Proceed on your own if asbestos is not an issue. The wood will come up in splinters if you don’t use the right equipment. For engineered wood, use a skill saw and cut the wood into 3×4 inch squares. Pry up the pieces with a crowbar. Use a sledgehammer to loosen the tongue sides.
After pulling the boards which weren’t nailed, pull up the tongued areas. If the tongued sides of the boards are completely exposed, use a crowbar to lift them up. However, there are tongued areas that stick with the bottom board and could be difficult pull out. Use a sledgehammer to loosen the hold. You can also use a thin chisel to chisel away the tongue between the board that you want to keep and the ones you want to get rid of. “Professionals have heavy duty electric tools to do a lot of the “dirty work,” says Payne. “However, it still requires a lot of “hand-to-hand combat’”.
Removing the glue used to adhere the wood to the substrate is the most difficult part of demoing a wood floor. It is particularly difficult to remove finished parquet if elastic adhesives have been used.
Glued parquet elements with a tongue and groove joint can be a little more complicated. It is necessary to break the connections between the individual planks.
If it is hard to insert a pry bar under the tongue, use a circular saw with a carbide blade to plunge-cut between two boards near the tongue side of the wall. Pull off the boards between the wall and the cut to expose the tongue edge. Pry up the remainder of the boards.
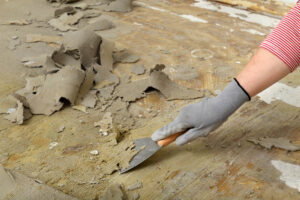
Removing Glue and Other Adhesives
Glue is easy to remove as long as the carpet was installed by a professional. The Concrete Network suggests the following:
Scrape it off using a long-handled floor scraper and then sweep it up for disposal. Be careful not to gouge or scratch the floor surface with the scraper blade.
If the glue is water-based, boil a pot of water, and apply it to the dry glue to soften it. Allow the water to soften the glue and then scrub the glue off with a rotary floor scrubber or the scraper before it cools. Don’t mix hot water with vinegar or citrus-based cleaners. These solutions can react with the concrete and etch the surface.
If you use an adhesive remover, read the label on the container to find out what substances the product will work on.
Use a floor sander or buffer fitted with a sanding disk for the main part of the floor and a handheld grinder along the walls and in the corners. This is the fastest and most efficient method for removing glue residue from large floor surfaces.
Material Disposal
Never burn wood planks. The adhesives, oils, sealing, paint, and varnishes can be harmful to your health and the environment. Call your municipality for proper disposal.
###
Rosie-Certified Content Partners
Photo Credits: Shutterstock
RELATED CONTENT