We are talking cabinets here, specifically, your cabinets. Imagine, just for a moment, that you are considering a new look for your kitchen or bathrooms. The first consideration is the layout. If the layout of your cabinets and countertops is working for you, then keep it.
The second consideration is the structural integrity of the cabinet box. Are the shelves sagging? Are the doors and drawers in good shape and do they open and close with ease? If the answer is “no”, determine if the issues are something you or a handyman could repair. If not, maybe new cabinets are the way to go. If the answer is “yes,” or only minor adjustments are needed, a refresh might be in your future.
What is a Cabinet Refresh?
Simply put, a cabinet refresh is a new surface on existing cabinets. It also saves our perfectly good cabinet structures from landfills, which is refreshing in it’s own way.
Refreshing cabinets are generally, significantly less costly than replacement. Refreshing comes in many different approaches. Some are simple DIYs, and some may require a professional.
Here’s How to Refresh Your Cabinets:
Let’s start with the simple choices and move on to the more complex choices.
Cabinet Hardware
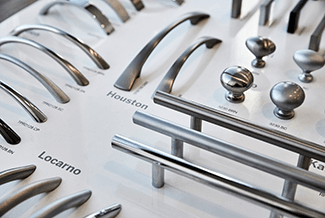
Sometimes just changing out the existing hinges (unless they are concealed), pulls, and handles with a different style and finish might do the trick. Updating from chrome and brass, popular in the 1980s and early 1990s, to a brushed nickel or an oiled bronze can give the cabinetry the only change it needs.
If replacing the hardware is not in your budget, give them a thorough cleaning. There are many videos that show how to remove and clean metal hardware, so it looks new. You can also paint them after a thorough cleaning. Make sure you use paint that is designed for metal.
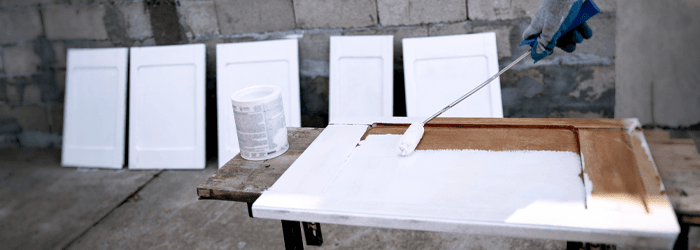
Cabinet Paint
Painting your existing cabinet surfaces is common and offers a dazzling result. Check out our blogs for color choices if you want some direction.
Painting the cabinets begins with removing the hardware (pulls and handles) and removing the doors and drawer fronts from the cabinet boxes. Doors are held on with hinges, and drawer fronts are typically attached to a drawer box with at least two screws that can be removed from inside the drawer box.
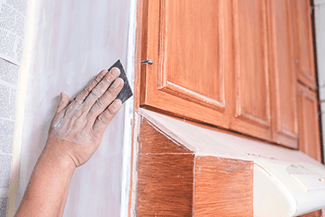
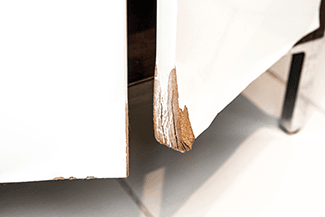
Once these have been removed, you need to prepare the face frame, doors, and drawer fronts. Typically, light sanding is needed to allow paint to better adhere to the surface. Painting over plastic laminate is not ideal, but it can be done. Water mixed with a little TSP (Trisodium Phosphate) will clean the surface and slightly etch it so the paint will better adhere and last a little longer. Look for dings, marks, or cracks in the wood grain. You may need to fill them with a putty or wood filler before sanding.
Once your surfaces have been prepped, start with a primer before applying the final coat(s) of paint. Depending upon the color coverage, more than one coat may be necessary.
We have seen great results by simply painting. If you truly want to dazzle, think about using more than one color. Face frames can be a color that complements a different color on doors and drawer fronts. Let your creative side out for a spin here!
Cabinet Restain
With wood cabinets, re-staining may be a viable option. We don’t recommend going from a dark walnut to a light natural color, though. The dark stain will get absorbed into the wood product and can be very difficult to remove entirely.
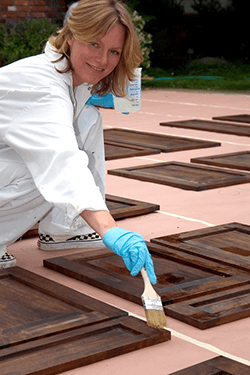
The process for re-staining follows the same procedure outlined above in prepping for paint, removal, sanding, and staining. Repairing cracks (known as “checks”) and dings may be challenging. Unless you get the filler color right, the stain may take to the filler differently than the wood. Also, consider a sealer as a finish coat. While not required, it does help protect and keep the color from fading over a longer time.
New Doors and Drawer Fronts.
Swapping out drawer fronts, doors, and even hardware will definitely alter the look and feel of your kitchen or bathroom. There are literally hundreds and hundreds of designs to choose from. These options keep the cabinet boxes, the functional part of the cabinet, intact. If you like your layout and your cabinets are structurally sound, this is a good way to go.
While it may be slightly more costly, it will be the most dramatic change to your cabinets.
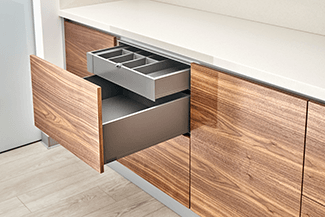
Occasionally, we find folks who want to keep the basic cabinet layout and structure. Under this heading, we include the possibility of making simple changes to your cabinetry. Replacing a cabinet with a drawer bank is one such common modification. It adds some cost but is still a big savings over a complete replacement.
Cabinet Refacing
This option may be the most technically challenging. Painting, staining, and even door and drawer front replacing can be done with a moderate skill level. Refacing kicks it up a notch.
The process starts out similarly with the removal of doors, drawer fronts, and hardware. It differs in what comes next. Refacing with either a wood veneer, plastic laminate, or PVC vinyl requires skill and tools for the job.
The surfaces need to be cleaned and prepped to receive a new glue or peel-and-stick veneer. These products are applied to those surfaces, and special tools are used to edge the veneers. Wood veneer is very thin and can be difficult to apply if the doors or drawers have intricate details on them.
The peel-and-stick products would not be our first choice as their longevity and quality consistency can be questionable with inferior products.
This option will take time and skill. Please don’t overestimate your skill level. You may find this DIY more frustrating than rewarding.
Each of the options outlined has the potential to transform your cabinetry and your home for a fraction of the cost of new cabinets. If you have done this or are contemplating such a project, please share some before and after pictures with us at info@rosieonthehouse.com.
###
Homeowner Handbook To-Do | #FreshenYourCabinets
PODCAST
Refreshing kitchen and bathroom cabinets can be a lot less expensive that purchasing new ones depending on the condition and construction. We give you ideas on making that refresh count. Plus homeowner questions on home noises, fixing a stucco block wall planter and roofing.
Podcast Archive With Expanded Content and Resources
PHOTO CREDIT
- Shutterstock