
WHAT’S THE BEST WAY TO CLEAN AND SEAL GROUT?
The lines of grout between the tiles in your shower, bathroom walls, and floor tiles can get grungy and gray after a while. Refresh its appearance by cleaning and resealing.
There Are Three Major Types of Grout:
1 | Un-sanded / Non-sanded Grout
Made from mixing cement, water and non-sand particles, it is used in grout lines smaller than an eighth of an inch wide. Because it does not have abrasive particles, this type of grout is great for natural stone such as polished marble and ceramic tile in shower floors and walls.
2 | Sanded Grout
A cement-based mortar that is ideal for grout lines that are larger than 1/8 inch, it is great for ceramic and stone tile. Because it is absorbent and may attract dirt; it should be sealed.
3 | Epoxy Grout
Strong, durable, and versatile, epoxy grout is made by combining epoxy resins and hardener. Impermeable to liquids and moisture, it is likely to be used for backsplashes, kitchen floors and bathrooms.
Cleaning The Grout
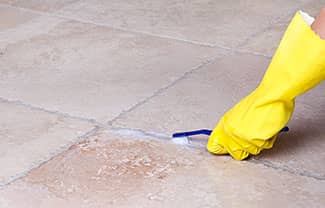
Unless you want to seal in the dirt, you must first clean the grout.
In my experience, the best method for cleaning grout is to wet the surface of dingy lines with a mixture of hot water and mild dish soap and let it sit for about 10 minutes. Then brush the grout lines with a toothbrush and rinse off the soapy water. This can be a time-consuming or tough job if you are doing a large floor of tiles or tall walls in a shower or bathroom.
Cleaning Notes:
- If you have synthetic grout that contain epoxy or urethane use neutral pH and/or mildly abrasive everyday household cleaners such as Soft Scrub® with Bleach. Do not use undiluted bleach or other harsh cleaners.
- Always test a new cleaning solution in an isolated area to make sure it doesn’t damage your flooring.
If you are not sure of the kind of grout you have, just stick with soap and water.
Tips:
- Pace yourself. You don’t have to get it all done in one day.
- Do your knees a favor and use a cushion or a gardening kneeler pad.
- Wear gloves to protect your hands.
- Wear a mask if you use non-natural cleaners.
- Open the window to let in the fresh air.
- Be especially careful not to use cleaners that contain harsh chemicals, acids, lemon, ammonia, or vinegar that can ruin the surface of your tiles and irritate your hands and eyes.
- Or … hire someone who specializes in tile or stone floors to do the job for you.
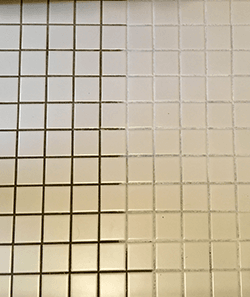
Sealing The Grout
Once the grout is cleaned, it is important to protect it from dirt, mold, bacteria, and mildew. Buy a high-quality, professional-grade sealer. Read the directions carefully before starting applications.
Now let’s get sealing:
1 | Only seal cement-based grout. Synthetic grouts that contain epoxy or urethane should NOT be sealed. Also do not seal grout that had a color or dye applied to it to cover up the dirt.
2 | Grout sealers will break down over time. You will need to reseal floor grout every three to five years and shower grout once a year. Again, always clean grout carefully before resealing.
3 | Buy the right applicator for the sealing job. A brush-tipped applicator is ideal for sealing the vertical joint lines found in showers and bathtub areas. A roller type applicator works best on tile floors or horizontal surfaces like countertops.
4 | Pay attention to temperature. To avoid the sealer from drying on the tile’s surface, don’t seal the grout when it’s hot in the house or on a surface that’s in direct sunlight.
5 | Work in small sections that can be finished in five to 10 minutes each. Make sure to thoroughly saturate the grout with the sealer. Then wipe away any excess sealer on tiles with paper towels after finishing a section.
6 | Let the sealer dry for at least three hours before walking on a tile floor or using any of the tile surfaces that were sealed. Let the tiles dry completely before using the shower area. This drying process can take a day or two.
7 | Clean hazy overspill. Haze may appear if the sealer got on tiles by mistake. Simply wet it down with more sealer and wipe off with paper towels.
Once the job is complete, you will be much more satisfied with how clean the tile in the bathrooms, flooring, or backsplash look. The next time this task hits your to-do list, you’ll know exactly how to do it and the job will go much more quickly.
Home Maintenance To-Do | #GroutSealing
###
Photo Credits: