Floor Prep Before Installing New Floors Is Important!
When installing new flooring, whether it’s wood, vinyl, tile, natural stone, or carpet, the key to proper installation and long-term durability is the condition of the surface upon which it is set. You must take the proper steps while preparing the surface before placing a new product upon it.
The surface, which is usually concrete, must be cleared of debris, cleaned, and repaired before installation. If it is not properly prepared and maintained before laying a new flooring system, many problems can arise, including:
- Uneven surfaces
- Poor adherence
- Cracks
- Holes
- Transference and hollow spots
- Voiding manufacturers warranties
These problems can create trip hazards or damage the furniture it is set upon the floor. If the surface prep is not done correctly, the new floor will quickly deteriorate, thus costing you more money, time, and aggravation.
Prepping The Surface
Cleaning
After removing the glue and other adhesives, thoroughly sweep and vacuum the area. Follow up with a damp mop. Do not
saturate the surface.
Check for moisture
Moisture coming up from the foundation is the enemy of flooring. It can ruin the flooring and the warranty may be voided. Before applying anything to the surface, you must conduct a moisture test, one of which you can do yourself.
Moisture is invisible. Touching, smelling, or looking at the slab cannot help you to determine if moisture is present. There are two methods to determine if there is moisture.
 Plastic Sheet Test | Take a sheet of one-foot by one-foot plastic (a garbage bag will work) and duct tape it to the surface. Leave it for 24 to 72 hours (72 is ideal). If condensation appears you have excess moisture.
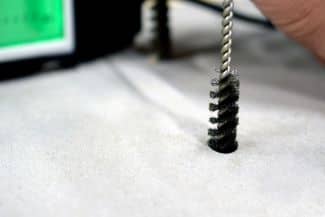
- Relative Humidity Test | This test should be performed by a foundation specialist, such as Rosie-Certified Partner, Arizona Foundation Solutions as it entails drilling into the slab and checking the humidity with a probe. You probably don’t have the probe, and most importantly, drilling into the slab can be extremely dangerous, especially if it is a post-tension slab. In a post-tension slab, everything is connected with steel tendons and strengthened through the steel tendons. You can tell if you have a post-tension slab by looking for a stamp in the garage that says “post-tension foundation system.” With a slab, you can see it’s not connected to the foundation.
- Calcium Chloride Test | This can be purchased online through Taylor Brand tools or many floor covering supply houses. Weigh the contents before and after opening it, cover it with duct tape, and follow their instructions. The test granules absorb moisture. This test, according to Von Payne, owner, East Valley Floors, a Rosie-Certified Partner, can be used in court if needed.
Regardless of the kind of slab you have, it is highly recommended that a moisture barrier be applied between the surface and flooring system, which we will discuss further down.
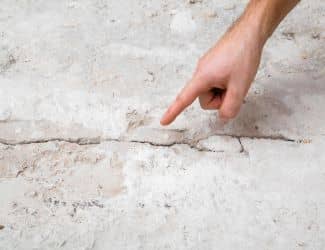
Repairing The Concrete

You need a rigid and flat surface without chunks of missing concrete or cracks in the foundation for a good installation.
Bram Flooring, a Rosie-Certified Partner, says you must walk the area and inspect it thoroughly. Look for cracks, valleys, missing concrete, and other imperfections. If you pulled up carpet, the tacking, and the tack nails, there will likely be holes left behind. They need to be filled, otherwise, you will have transference. You can use a concrete patch, then sand the surface. This is especially important if the flooring you put down is a click-together vinyl. The flooring will not seamlessly click together.
While you’re at it, this is also the ideal time to have a termite inspection and treatment. Cracks and holes wider than a pencil lead should be termite treated.
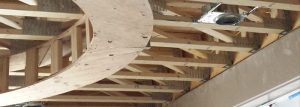
For other than concrete slabs with flooring on floor joist, the subfloor should be at least 1.125-inches thick. Measure it with a ruler so you can have an accurate measurement. Check that the subfloor is not too flexible, as that would allow flooring such as tile and natural stone to crack later. Strengthen the subfloor by adding more floor support if needed. The surface
needs to be rigid and hard so that the flooring will remain supported. You may need to hire a contractor to do that.
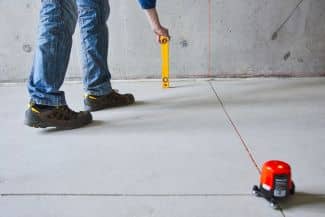
Be aware of the variance the manufacturer allows with their product. If you have a failure, the product may not be warrantied. Our flooring experts tell us that the manufacturers tend to use this excuse to void the warranty. You need the floor flat at three-sixteenth of an inch for every 10 feet. If the floor isn’t within a three-sixteenths variance in any 10-foot direction, the flooring may fail, and your warranty could be voided.
“The standard rule I’ve heard in Arizona for the last 35 years is 1/8” variance in 4ft. ¼” in 10ft. But the manufacturer’s requirements trump all other ‘general rules.’ Read the boxes!” says Payne.
“Improper floor prep can kill a claim,” says Bobby Serafin, general manager, Mission Hardwood Floors, a Rosie-Certified Partner. He suggests using a laser to evaluate the flatness of the concrete. “If the surface is not flat, the flooring will come up.”
Placing New Flooring Over An Existing Floor
There are some flooring systems that can be installed directly on an old system. Laminate flooring, Interlocking LVT (luxury vinyl tile), LVT over a paper underlayment, and Interlocking wood floors may be good options. However, the new floor will only be as sound as the one it is laid upon, and most manufacturers will void their warranty if you do so. Check with the manufacturer before going that route.
You may be able to install over existing flooring in these instances:
- The height allows it.
- The old floor is level, solid, and without structural deficiencies.
- If asbestos is present in the old floor and you don’t want to disturb it.
- The new floor covering manufacturer allows it.
The flooring is not actually installed directly on the old one. The installation is a “floating floor.”
This refers to the installation method for different floor types, including laminate, vinyl, and engineered wood planks. The flooring freely “floats” above the subfloor. It is not attached or held down by nails. Sometimes, glue is used along the edges of boards. All stopping points must be covered by trim or end moldings/caps made by the manufacturer because these floors are attached to themselves and held down only by gravity.
If it is acceptable, thoroughly clean the floor, and repair cracks, peels, and other imperfections, just as you would with any other floor prep.
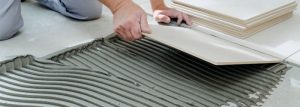
Applying the Flooring Adhesive
Make sure the surface and the area are clean and without cracks and valleys. Follow the adhesive manufacturer’s instructions.
Warranty
Another word about warranties. Once you start laying the flooring, you have what is known in the industry, as accepting the substrate or surface. That is critical because if you did not perform your due diligence during the prep work, the warranty of the products may be void. You will likely have to pay to have the flooring fixed or reinstalled.
###
Rosie Certified Partner Content Contributions:
RELATED CONTENT
- DIY FAQ: Can I Floor Over Perfectly Good Sheet Vinyl?
- DIY FAQ: How Can I Tell If My Foundation Is Prone To Soil-Related Damage?
- DIY FAQ: What Can A Homebuilder Do To Prevent Future Problems With Heaving and Settling?
Photo Credits: Shutterstock