Drywall might look simple once it’s painted and finished, but anyone who has tried to patch a hole or smooth out a damaged wall knows there’s more going on beneath the surface. From proper framing and taping techniques to understanding textures, drywall repairs require the right materials, timing, and a bit of patience.
Start with the surface
One of the most common mistakes homeowners make when repairing drywall is trying to work around existing damage instead of starting with a clean, flat surface.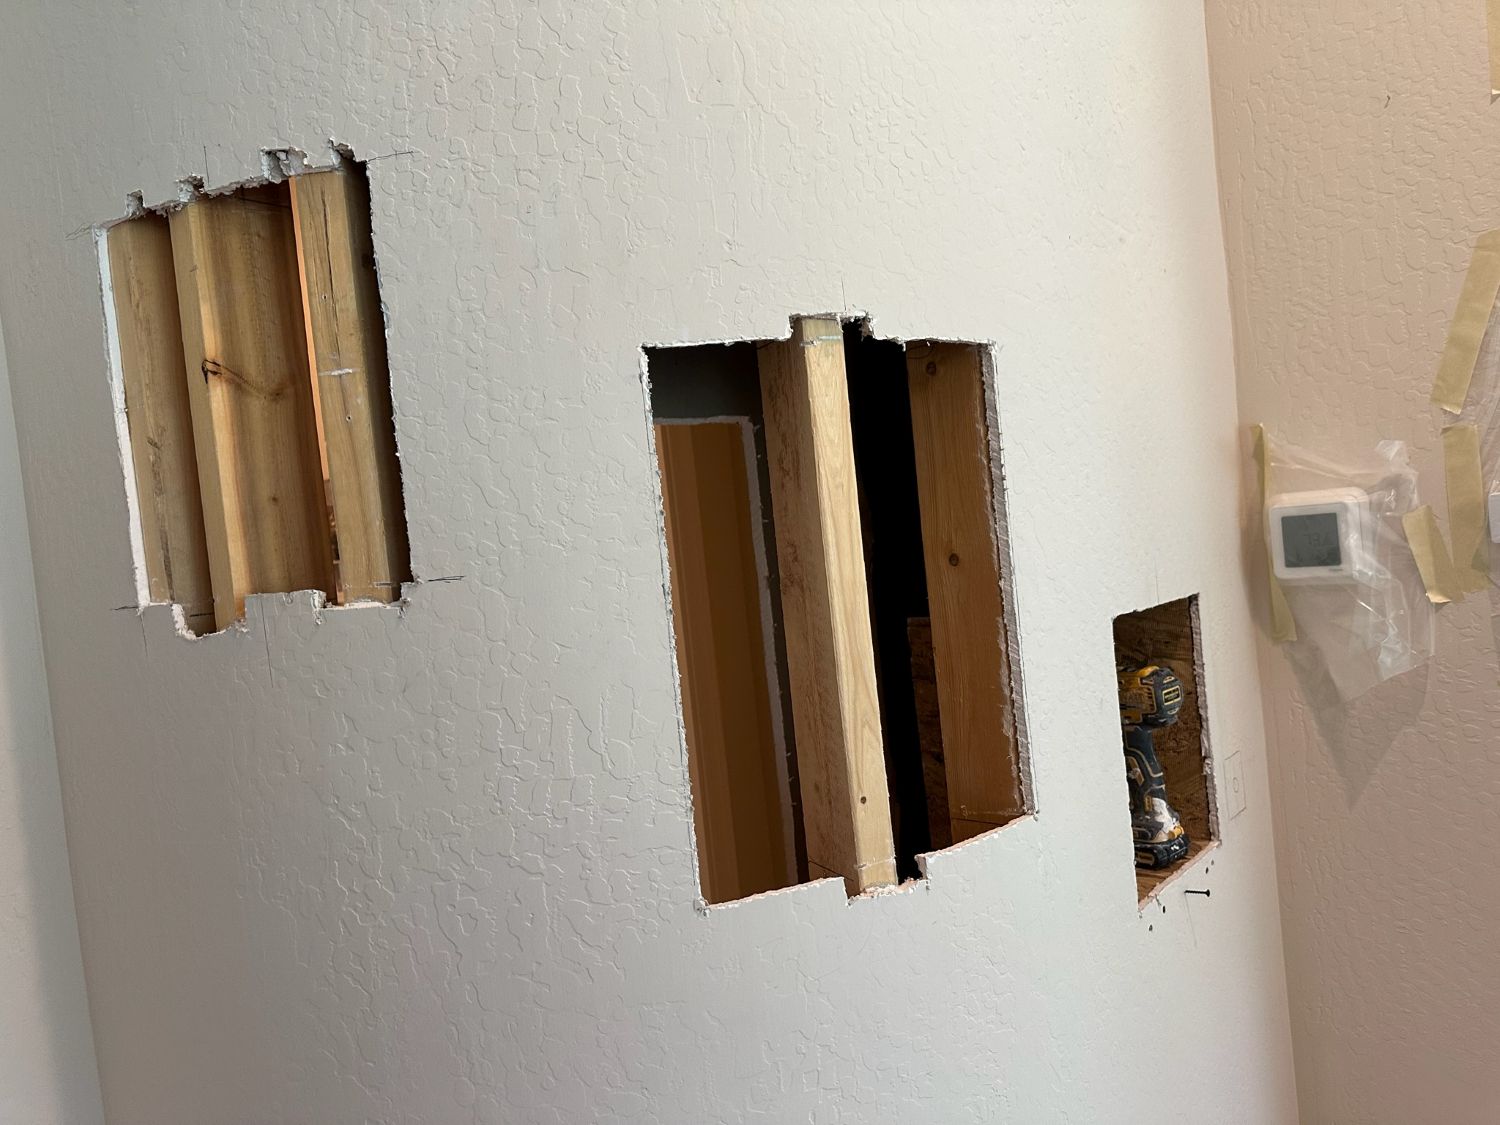
According to Rick Thompson of Thompson’s Drywall Services, removing the damaged section entirely is often the best path forward.
“The drywall with the built-up compound needs to be cut back far enough to make a clean repair,” Thompson said. “We don’t want to work around the built-up drywall – we want to remove it first.”
If the area already has layers of compound built up around a patch or a previous repair, trying to skim over it usually results in uneven walls and visible seams later.
When filling in openings such as a removed window or door, this principle becomes even more important. Removing drywall around the opening allows new framing and sheetrock to sit flush with the surrounding wall, helping the repair disappear once finished.
The importance of proper framing
Drywall repairs often involve more than just patching a hole. In many cases, especially when closing up larger openings, framing is required to support the new drywall panel.
If framing is installed over existing drywall rather than removing it, the area may end up slightly raised compared to the surrounding wall. That unevenness can lead to bulging or noticeable transitions once the wall is finished and painted.
Removing the surrounding drywall allows the new framing and sheetrock to align properly with the rest of the wall, creating a smoother finished surface. Good framing also helps ensure the wall remains stable over time, reducing the chances of future cracks.
Mesh tape vs. paper tape
Another common question during drywall repair is which type of tape to use. Both mesh and paper tape have their place, but they’re typically used for different situations. For small repairs, mesh tape is often the better choice.
“Mesh tape is best for small repairs,” Thompson said. “You use a fast-drying setting compound for the first coat, and then all-purpose joint compound goes over the repair.”
Fast-setting compound comes in powder form and hardens quickly. It’s ideal for stabilizing repairs and creating the base layer that holds everything together. Paper tape is usually reserved for larger projects, such as room additions or major drywall installations, where long seams need reinforcement. Regardless of which tape you use, preparation matters.
“Your repair is only as good as the surface you’re putting the tape on,” Thompson said.
If the repair area has exposed drywall dust or residue, wipe it down with a damp sponge and allow it to dry before applying tape and compound.
Shaping the repair
Once the tape is embedded in the first coat of compound, the repair process continues with additional layers. The goal is to shape the surface until it matches the surrounding wall gradually. After the first coat sets, a layer of all-purpose joint compound helps refine the shape.
The final stage often involves texturing the surface to match the existing wall. Skip trowel is a popular drywall texture in many Southwestern homes. The finish has a slightly rustic look, with smooth areas interrupted by raised patches of compound that create subtle depth across the wall. The technique relies on a fairly loose mixture of compound. When mixing, the consistency of your joint compound should slowly ‘run’ off your texture knife.
The compound is applied with a drywall knife in a sweeping motion, allowing portions of the mud to “skip” across the surface and leave behind irregular patterns. When texture is applied using a sprayer, the consistency matters just as much.
“When spraying, the texture of the mud should be a little thinner than when applying a skip trowel finish,” Thompson said. “That could change depending on what the wall looks like. A good way to check for the right spray texture is to run your finger through it, and when the drywall mud in your bucket collapses into the finger trail, that means it’s ready.”
This thinner consistency allows the material to move smoothly through a hopper sprayer and produce a consistent finish.
What is topping compound?
Not all drywall compounds serve the same purpose. One product, the topping compound, is specifically designed for the final stage of finishing and texturing. Thompson said that it’s the last coat used in the skip trowel texture, but it can also be used with spray texture.
Unlike all-purpose compounds, the topping compound contains less adhesive. That means it doesn’t have enough bonding strength to hold drywall tape in place. Because of this, topping should never be used during the taping stage of a repair. Instead, reserve it for the final surface layer.
Preventing stress cracks
One of the most frustrating drywall issues homeowners encounter is stress cracks, especially above doors and windows. These cracks often form because of how the drywall sheets were installed in the first place or because the house or foundation is moving.
“Drywall is nonstructural. If the house moves, the drywall will crack. Stress cracks happen when drywall seams are placed over doors and windows,” Thompson said.
When drywall seams align with those openings, the natural movement of the structure can place extra pressure on the joint. Over time, that stress can cause the compound and tape to crack.
A better approach is to stagger drywall sheets so that seams fall away from those vulnerable areas. Staggering panels and running full sheets across framing members helps distribute stress more evenly throughout the wall. For example, drywall sheets are often installed horizontally across studs or trusses to minimize the number of seams.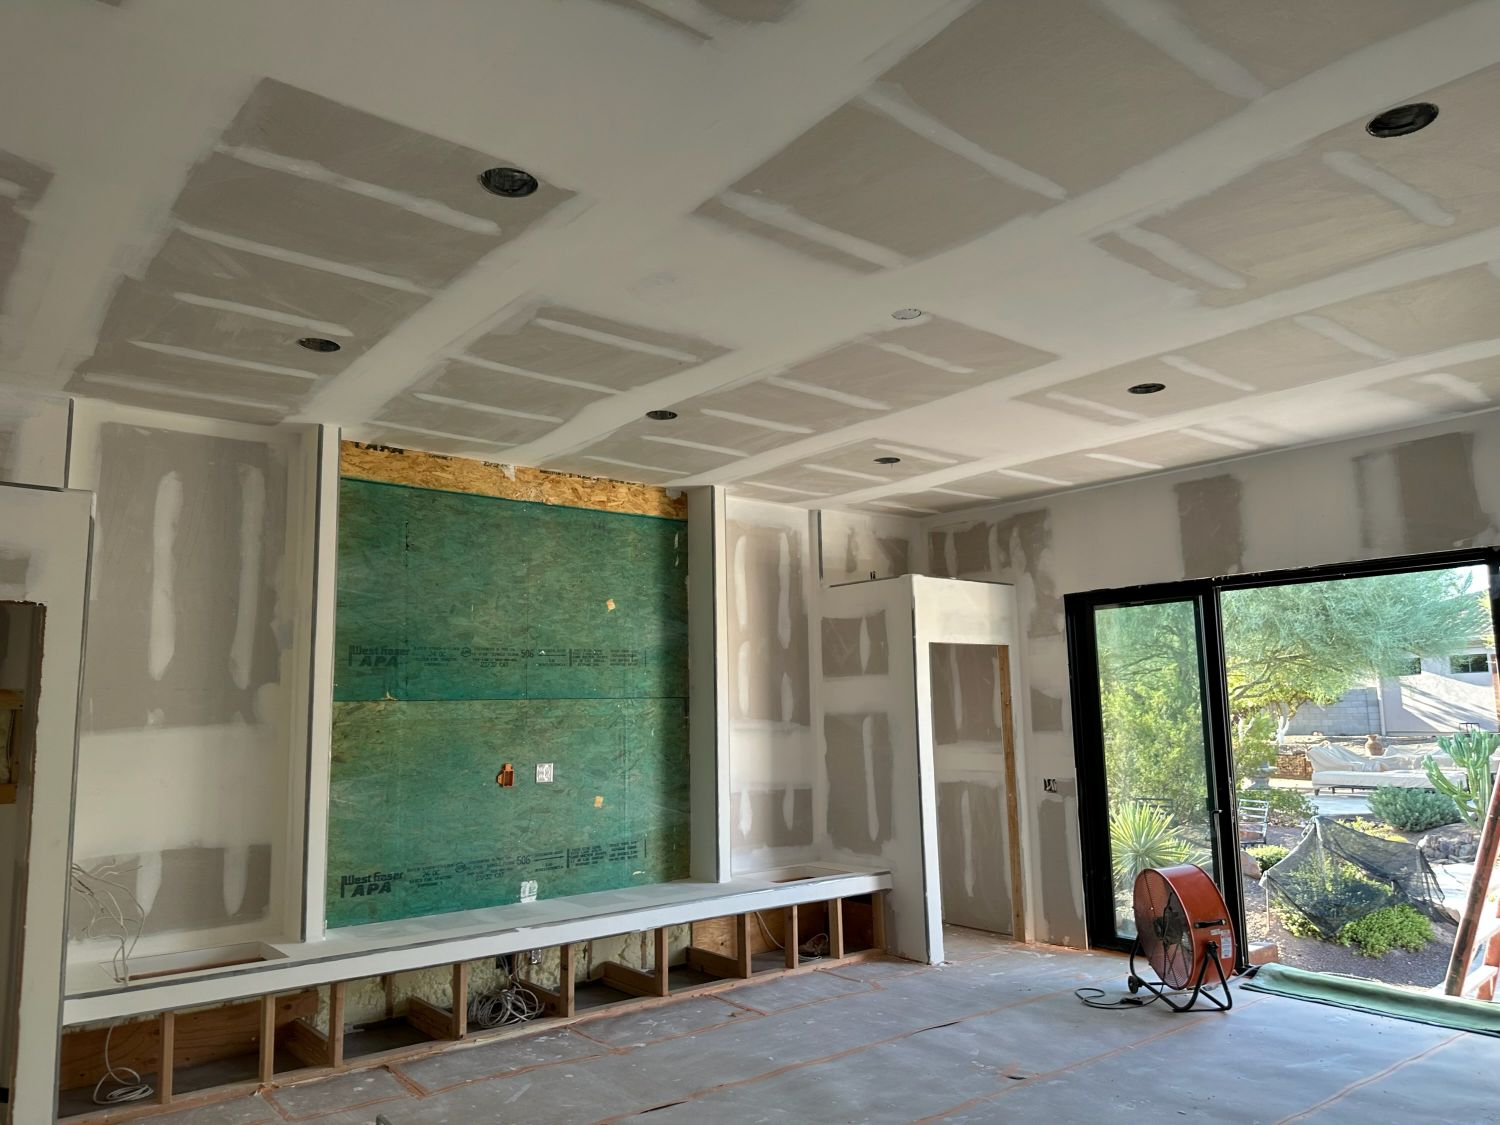
Another drywall tip that professionals swear by is the order in which surfaces are installed and finished. Finishing the ceiling first allows wall panels to help support the edges of the ceiling drywall. It also prevents damage to freshly finished walls while ceiling work is being completed.
This small sequencing detail can make the entire project easier and produce cleaner results. Once the repair is fully built up and textured, the finishing touches begin.
Light sanding helps smooth out any raised edges or imperfections. This step should be gentle; aggressive sanding can damage the texture and expose tape beneath the compound. After sanding, the area should be wiped clean to remove dust before painting.
Primer is another step that shouldn’t be skipped.
“Using a paint primer over a repair is key to preventing flashing,” Thompson said. Flashing occurs when repaired areas absorb paint differently than the surrounding wall, creating visible dull or shiny patches. A dedicated primer seals the repair and helps the final coat of paint blend evenly.
Timing matters for outdoor drywall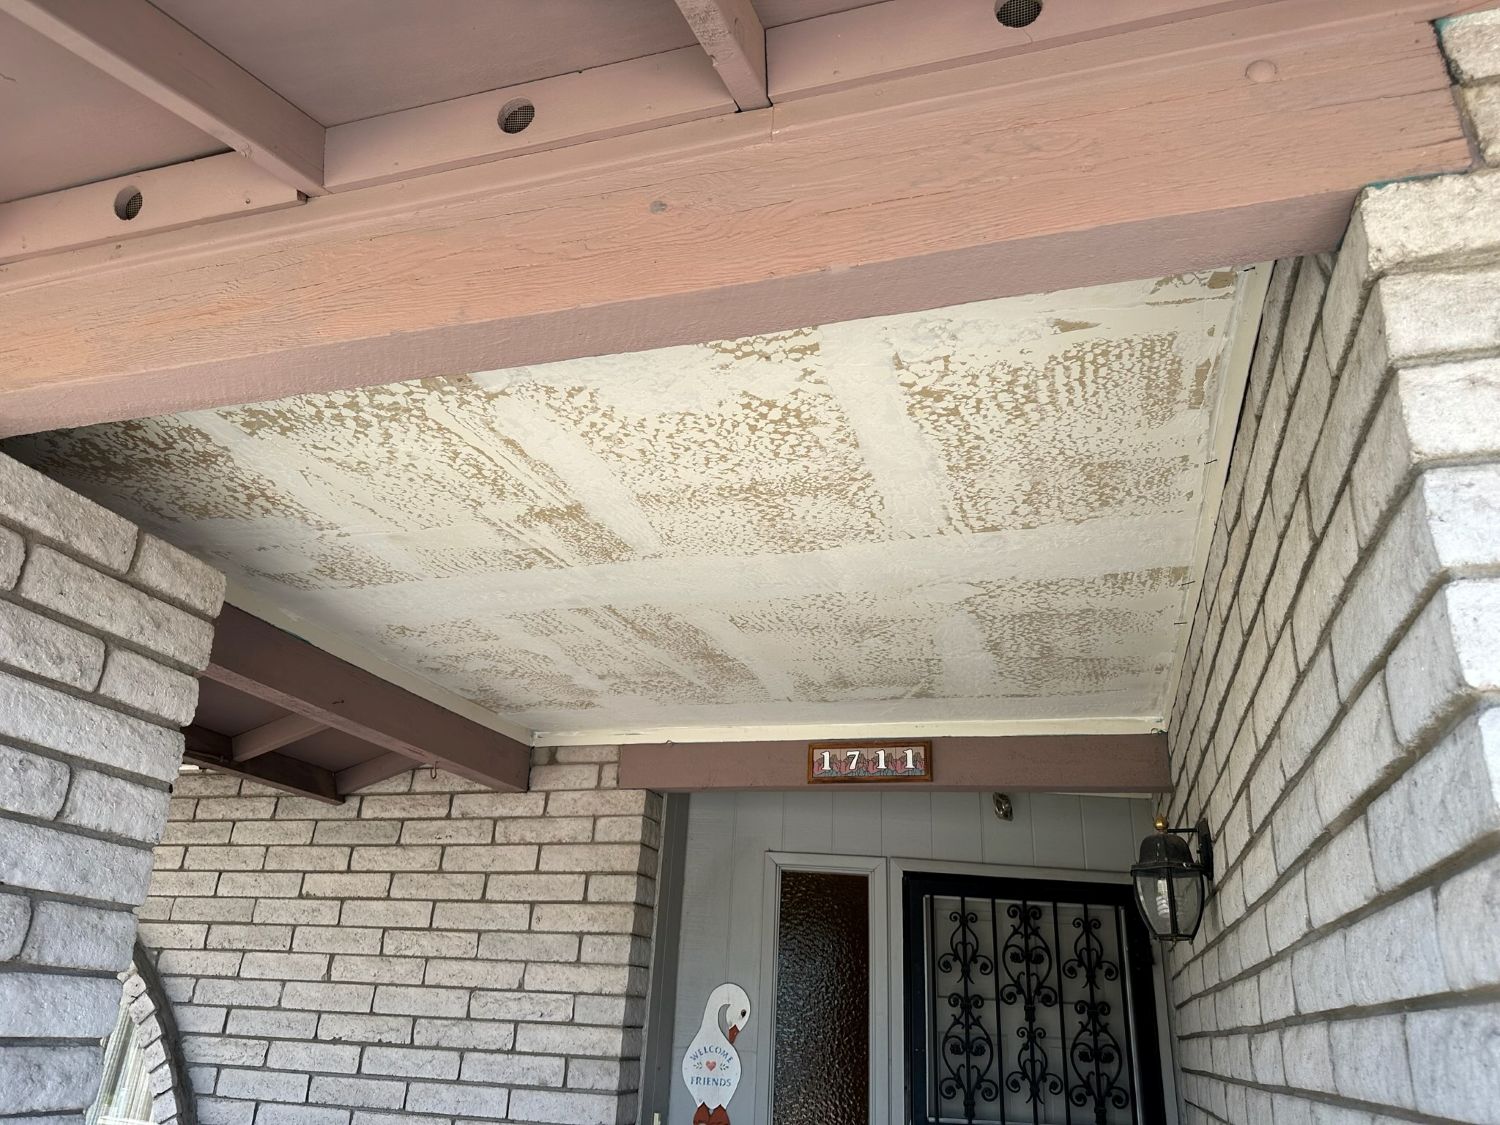
While most drywall work happens indoors, patio ceilings and outdoor drywall surfaces require additional planning. Temperature and humidity can affect how compounds dry and cure.
For outdoor drywall repairs, Thompson recommends tackling the project during moderate weather. Spring and fall often provide the most constant conditions, helping the drywall dry evenly.
Drywall repair may not seem glamorous, but it plays a major role in how finished interiors look and feel. A well-executed repair disappears into the wall, leaving no visible trace behind.
###
CONTENT PARTNER | THOMPSON’S DRYWALL
Thompson’s Drywall Services is a small company which can provide a more affordable and personal working relationship. Although Rick is native to AZ, he has acquired several different drywall finishing and texture techniques from one coast of the US to the other. Rick has worked on many large and small projects through-out his 31+ years in the drywall industry. His ability to match texture is incredible. Rick takes great personal pride in each and every project.
PODCAST
Drywall Repairs: Pro Tips For Seamless Walls | Broadcast Archive Page With Expanded Content
PHOTO CREDIT
- Thompson’s Drywall