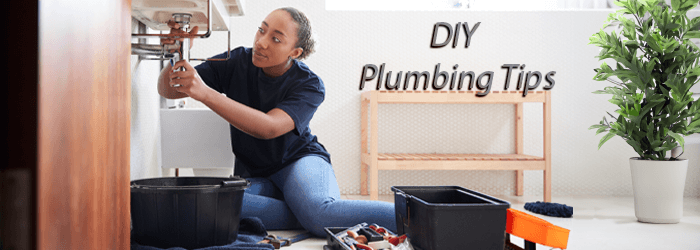
Home plumbing issues can seem complicated to some and daunting to others. In either case, plumbing issues can stall your workflow and can’t be ignored! There are some repairs that homeowners can do with the right tools and info. These few simple fixes for common problems can stop little plumbing problems from becoming big ones!
Tip 1 | How To Deal With Plumbing Clogs
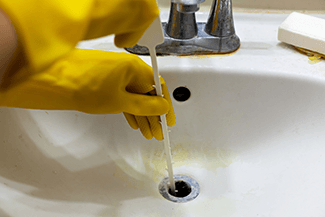
It never fails that if your sink is going to clog, it will happen when you expect company for dinner! If you find yourself in this situation, don’t panic! David Johnson and Steve Mason of Rosie on the House Certified Mason Pro Services offer these tips for working through this common plumbing problem:
The first line of action with a clog is to identify if the stoppage is localized to a single fixture or if there is a system-wide failure.
Observe the lowest drains in your home to determine which scenario it is. The lowest drain is typically the tub or shower on the lowest floor. If these are backed up, you may need to call a professional. If you are dealing with a localized clog, like a sink, you may be able to solve it and become the hero DIYer at your home.
When it comes to clearing clogs, David and Steve advise homeowners to:
- Avoid drain cleaners. These products are caustic and can damage the pipes, no matter which kind you have: metal, or plastic.
- Do not force the pipe’s screw-on connections, like the joints of the P trap, when trying to separate them. You should be able to unscrew connections by hand. Be gentle if the plumbing is stuck due to age and you need to use a wrench.
- Use a plumbing snake or a re-tasked metal coat hanger to loosen the clog from the drain.
Tip 2 | How To Exercise Your Angle Stops
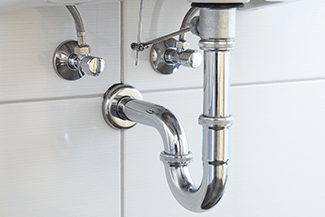
Angle stops are two handles located under the sink, often right where the hot and cold supply lines come out of the wall or up from the floor to regulate the water coming to the fixture. A toilet has only one angle stop.
Stops can become stuck due to calcium buildup. David and Steve advise us to locate the stops and turn them on and off a couple of times a year. This “exercise” can prevent them from being hard to open or “frozen” shut. When you need the water shut off at the fixture in an emergency, you’ll be thankful you’ve maintained your angle stops.
If they do become difficult to turn, have them replaced. If they are stuck and you force them with a wrench, they can break and cause a real mess.
Tip 3 | How To Change a Faucet or a Filter
Is changing the faucet on your sink a DIY project? It sure can be! Here are a few easy tips from our Mason Pro Plumbers:
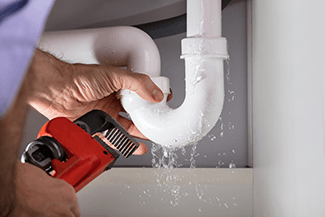
- First | Determine if any special tools are needed. That information should be on the outside of the faucet packaging.
- Second | Turn off the water supply. The water can be turned off to the whole house or at the angle stop you’ve diligently exercised.
- Third | Locate a pair of Channellocks. Faucets are usually fastened from underneath, and you may need a good pair of channel locks to loosen the nuts of the old fixture.
In-line filter replacement is another common DIY task. Again, make sure the supply is shut off before removing the old filter. This repair is another area where the screw connections should be able to be undone by hand. These are usually plastic and can be easily broken.
Tip 4 | How To Maintain Your Water Heater
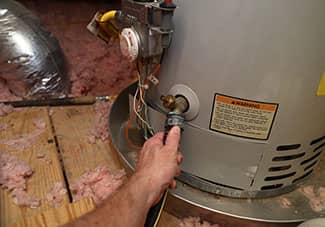
Steve Mason says to “flush your water heater every year or so, depending on the hardness of your water supply”. Hard water means that the water from your tap has minerals and sediments that build up in your appliances and bathroom fixtures. In the case of the water heater, the buildup happens in the bottom of the tank and can affect its performance.
How to drain your hot water tank:
- First, turn off the breaker to the water heater. If you have gas, shut the gas off.
- Next, turn off the water to the tank at the valve. Then, open a hot water valve farthest from the tank to drain it.
- Look for a garden hose-type connection at the base of the tank. Attach a hose to the tank and place the other end of the hose outside.
- Open the water valve again so that it fills the tank. Observe the water as it comes out of the hose paying particular attention to the amount of sediment that comes out with it. If there is a lot of sediment, consider draining your unit every 6 months.
- If nothing comes out and your water heater is over a few years old, your water heater is likely clogged with sediment. It may be time to call a pro.
- If you have an older water heater that has never been drained, we don’t recommend you start now. When you get a new unit, be sure to drain it yearly.
For us visual learners, check out our video on How To Flush Your Water Heater.
Top 5 | How To Fix Toilet Leaks
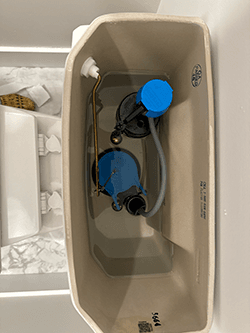
The sound of running water from your toilet is annoying and wasteful. That sound indicates that water continues to trickle from the water tank into the bowl of the toilet. It will not stop running on its own and requires repair. A running toilet wastes an average of 3 gallons of water per hour. If this leak is not fixed in a timely manner, it can add up to thousands of gallons of wasted water and add hundreds of dollars to your water bill.
The culprit of the leak is the flapper valve. Over time, these devices can become worn and need to be replaced. Click here to see a diagram for how the flapper works.
How to replace the toilet flapper:
- Turn off the single angle stop at the back of the toilet that supplies the water.
- Flush the toilet to remove water from the holding tank.
The flapper is at the bottom of the tank and is hinged to a fitting that secures it. Start by removing the old one. Take the flapper to the hardware store and pick up a matching flapper. Simply install the new one to the flapper fitting. Make sure that it sits snugly over the drain hole in the tank. Once the new flapper is installed, turn the water back on, and the tank will fill. You should no longer hear running water once the tank is full.
We hope you’ve find these tips helpful! You can learn more by visiting our website for more DIY Plumbing tips. Have questions? Comment below!
###
Homeowner Handbook | #5PlumbingTips
PODCAST
Our Weekly To Do with 5 DIY plumbing tips. Discussion of a homeowner’s mystery buzzing noise in the home, sound deadening a room and an update on building a Rosie On The House Habitat For Humanity home as we celebrate our #1 Best Contractor Referral Service Award in Arizona for the 15th year in a row!
Podcast Archive With Expanded Content and Resources
PHOTO CREDIT
- Shutterstock/iStock