Installing a Flagpole
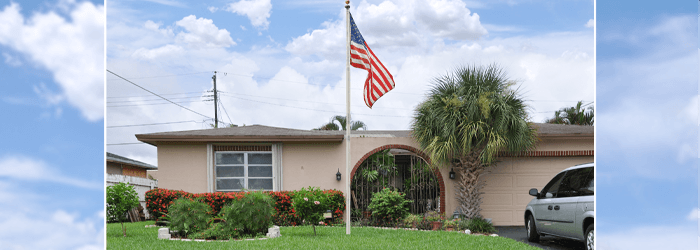
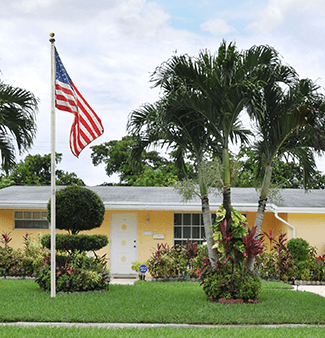
Want to let your true colors fly? Whether it’s the American flag, Arizona flag, your favorite sports teams (the Saints & LSU), or welcoming a new season, hoisting your flag high in the air lets everyone around know you are proud of where you come from and what you support.
With the help of our friends at This Old House, we will take you through the steps to select and install an in-ground flagpole.
The Anatomy of a Flagpole
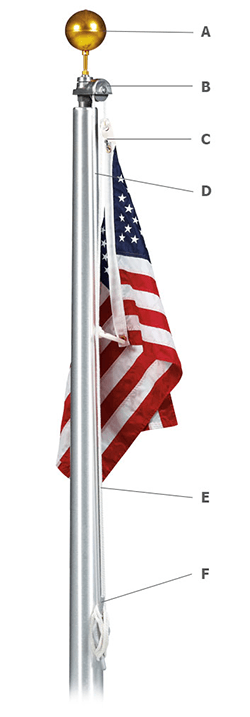 There are many components to a flagpole. Knowing what they are will make installation much easier. Carrot-Top Industries explains them below.
A | Finial
A decorative ornament that’s mounted at the top of the flagpole, above the truck. Typically, a finial might be in the shape of an acorn, a ball, or an eagle.
B | Truck
Pulley assembly that mounts at the top of the flagpole. Stationary trucks are mounted over the top of the flagpole and are secured with setscrews, while revolving trucks screw into the flagpole’s top with a standard 1 ¼” National Pipe Thread spindle. Revolving trucks are mounted with bearings that allow them to turn along with prevailing winds.
C | Snaphook
Also referred to as a flag snap, the snaphook is a metal or vinyl hook with a spring closure, used to attach the flag to the halyard. Snaphooks are similar to the type of closure often found on a dog’s leash.
D | Halyard Channel
Usually several feet long, the halyard channel extends upward from the cleat, covering the external halyard and helping protect against theft or vandalism.
E | Halyard
The halyard is the rope that is used to raise or lower the flag and can be located internally or on the outside of the pole. The halyard runs through the pulley system in the flagpole’s truck and is secured with the cleat at the base of the pole.
F | Cleat
A T-shaped metal device that holds the hoisted flag in place by wrapping the halyard around the cleat multiple times. The cleat is typically mounted to the pole about five feet above ground level.
G | Butt
The flagpole’s base end; the larger, lower end of the flagpole shaft.
H | Flash Collar
A cover that goes around the base of the pole at ground level, usually the same color and material as the flagpole. A flash collar gives the pole a clean, finished look and helps protect the flagpole and foundation from the elements.
I | Foundation Tube
A steel or PVC tube that is placed in the ground to support and hold the shaft securely in place.
Placement & Height
Now that you know the terminology, it’s time to decide where the pole will be placed. Assemble a mock-up with PVC pipe and couplers. Have someone hold up the pole in various spots so you can judge the effect from afar. Consider the height of the house or building when selecting the pole’s height: 18 to 25 feet for a single-story building, 25 to 30 feet for two stories, and 30 to 40 feet for three stories.
You may find it helpful read the laws about flying the American flag. You can review the “Conduct during hoisting, lowering or passing of flag” in Section 9 of the Flag Code.
Types of Poles
There are several types of poles to consider.
Wood:
Historically authentic and the most expensive option. Like the wood on the exterior of your house, it must withstand the elements for a long time, and therefore requires regular maintenance.
Standard Aluminum:
Although light, easy to install, and available with internal rigging—no halyards to clang against metal. Note that some painted aluminum poles chip, leaving uncoated spots that may stain. Select a durable finish with a clear-coated brushed metal, which often looks incongruous against a white clapboard house.
Fiberglass:
Look for one with a UV-resistant finish and constructed with the majority of fibers running vertically. Horizontal fibers are not as strong and can cause failure. Fiberglass poles are available in various colors and are light, easy to install, and maintenance-free. The rigging can be run inside the pole to eliminate the sound of slapping halyards. Lowering the flag takes a little work.
Telescoping Aluminum:
The model has retracting buttons and joints and is easily portable. Putting them up and taking them down takes just a few minutes.
Installing the Pole
You will need these tools and materials for proper installation.
Tools & Materials
- Post hole digger
- Wheelbarrow
- Shovel
- Level
- Sawhorses
- Drill/driver
- Drill bit
- Ratchet wrench and sockets
- Work gloves
1 | Dig a Foundation for the Anchor
- The day before installation, dig a foundation hole 30 inches deep and 24 inches in diameter, using a post-hole digger and shovel. This will hold the painted steel anchor, which supports the pole and prevents ground moisture from wicking up and rotting the wood.
- For soil that doesn’t drain well, add six inches of gravel or crushed rock to the bottom of the hole you dug.
- Following the instructions on the bag, mix a batch of Redi-Mix cement. It will take several bags. Fill in around the base of the pole (roughly six inches of concrete). Let it set per the mix’s instructions, then drop in the anchor.
- Allow the concrete to set at least two days (one week is better) before using the pole.
- Check the anchor’s alignment using an 18-inch bubble level or laser level, then fill the hole with concrete and trowel it smooth.
2 | Drill Holes for the Pivot Bolt
- After the concrete has set for 24 hours, rest the pole on two padded sawhorses.
- Center the cleat on the pole’s halyard side by measuring 42 inches from the bottom.
- Using an 11/16-inch bit, drill holes for two ⅝-inch bolts.
3 | Attach the Finial
 To affix the truck (the flanged top that holds the finial and through which the halyards are threaded), set the double sheave into a notch on the top of the pole, so a sheave with the halyard pulled through lines up with a cleat on the base.
- Before screwing the truck on, coat the inside and edges with silicone caulking for a watertight seal.
- Fit the finial into a ½-inch threaded hole in the center of the truck.
4 | Install the Pole
- Set the pole into the anchor and insert the pivot bolt. Adjust the pole until it is plumb, checking how it looks from afar as a helper holds it steady.
- Holding the preferred position, mark the pole at the predrilled holes on the anchor. Remove the pole, rest it on the padded sawhorses, and drill holes for the locking bolt.
- Insert the pole into the anchor again and install the pivot bolt.
- Finally, install the locking bolt and finger tighten it. Once again, check to make sure the pole is plumb.
If you want your flag to fly from dusk to dawn, per the Flag Code, it must be illuminated. Add a solar light. You won’t have to dig a trench for an electric line or deal with expensive outdoor light! Solar light kits for flag poles are available at most flag dealers and online.
After the installation is complete, attach your flag.
When you are ready to buy or replace your American flag, look for the Flag Manufactures of Association of America (FMAA) Certified American Made seal to know you are buying a flag made here in America! The flag we have in our eStore is manufactured by Valley Forge Flag company and carries the Platinum seal.
If a flagpole is not an option, purchase the Stainless Steel Flag Pole Mounting Bracket , also available in our eStore and hoist your flag high to the sky!
Home Maintenance To-Do | #FlagPole
###
Photo Credit
- Carrot-Top Industries
- Shutterstock
Related Content