Refinishing an existing wood surface can be a straightforward process with the right know-how. If you’re less experienced with repainting or restaining wood, our prepping tips for existing surfaces can be very helpful.
Here, we will look at new and old wood that has not been painted or stained. The initial preparation process for both is essentially the same. We consulted Rob and Russ Byers with Rosie on the House Certified Partner, ACP Painting, for some tips for a well-done project.
Tips For Sanding Wood
Whether you are painting or staining, the process starts with sanding. Regardless of the coarseness of the wood surface, sanding the whole surface is recommended. Below are some sanding tips from our professionals:
-

Always sand in the direction of the wood’s grain. Sandpaper | Most wood surfaces purchased and used as trim work will only need a light sanding using 220-grit sandpaper. If the wood surfaces are rough, you may want to start with 100 to 120-grit sandpaper and finish with the finer 220-grit. The higher the sandpaper number, the finer the grit.
- Hand Sanding | Wrap sandpaper around a block with a flat surface for even sanding. Always sand in the direction of the wood’s grain.
- Machine Sanding | Using the same grit sandpaper as you would by hand, machine sanding can make the work easier. A palm sander or a belt sander is best. We don’t recommend using an orbital or circular sander because they will produce tiny circles in the wood’s grain that could be visible through the final finish.
- Foam Sanding Blocks | These prepared blocks are available in a coarse, medium, or fine grade that is generally acceptable for work around your home.
Tips For Cleaning Wood
Before painting or staining, wipe down the surfaces to remove the dust from sanding.
A slightly dampened cloth will do the trick. A tack cloth is better. A tack cloth is a resin-coated cloth with a sticky surface that picks up dust and residue. It can be purchased where you buy your painting supplies.
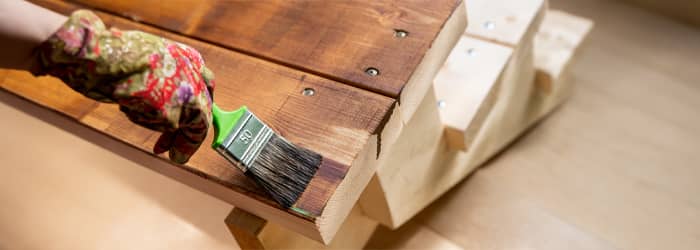
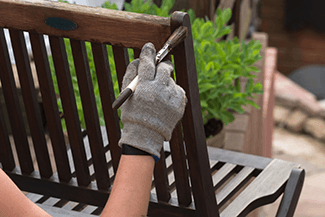
Tips For Staining or Painting Wood
At this point, the preparation process is the same, with one exception. Skip the sanding for coarse exterior wood that you want to appear rugged. Read more about exterior painting prep here.
NOTE: If you will not be working in a well-ventilated area, wear a respirator mask.
Staining Wood
If you apply the stain by hand with a brush, wipe off the excess stain with a cloth after letting the stain sit for a minute or two. Be careful and try to complete a whole section or surface before stopping. The stopping and starting points may be visible when you finish, so choose your stopping points carefully.
Painting Wood
Let’s discuss the differences between old and new wood. Every type of wood has tannins that can bleed through a coat or two of paint. Tannins are naturally occurring acid chemicals found in tree sap. Older wood can be more prone to this bleeding. You can avoid bleeding by using a primer specifically for wood. After priming, let the surface completely dry and check for bleed-through. If bleeding occurs when using a latex primer (the most common type), you may need to switch to an oil-based primer.
Rob and Russ say that you can use an oil primer over a latex primer, though it is not recommended for painted surfaces.

Apply the first coat of paint and let it completely dry. Then lightly sand the surface to rough it up, allowing the next coat of paint to adhere. Be careful not to remove the first coat of paint. Sanding with a 300-grit sandpaper is best.
Use a short nap roller or soft bristle brush to minimize stippling from the roller or brush strokes. A shorter nap holds less paint and will help produce a smoother finish.
By following these tips, you can create wood projects that appear professionally crafted.
We love to see pictures of home DIY projects! Please send yours to info@rosieonthehouse.com or share with us on social media.
###
Homeowner Handbook | #CleaningPaintingSandingWood
PODCAST
The Weekly To Do on sanding, cleaning, and painting wood. Plenty of tips you should know if you’re closing your home for the summer or extended vacation. Question on birds pecking the fascia and more!
Podcast Archive With Expanded Content and Resources
PHOTO CREDIT
- Rosie on the House
- Shutterstock/iStock