Make Caulking Easier With These Tips (and Practice!)
Whether you are caulking a new joint or replacing worn-out caulking, the only difference will be in the prep.
The Caulking Prep!
It’s not all in the prep, but any good caulking project starts there.

Begin all caulk projects by making sure the surface that the caulk will touch is clean.
New caulking projects should be free of dust, oils, and excess water, as these will prevent the caulk from adhering to the surfaces.
Removing old caulking may require a painter’s knife to scrape away bits of old caulk and the yucky grime that may have built up over the years. You can clean the area further by whipping up a homemade cleaner recipe. Or you can use an over-the-counter household cleaner to cut the dirt and kill any mildew lurking in the cracks.
There are two schools of thought about using tape to guide the caulking bead. Read on a bit, and then you can decide how to proceed.
The Caulking Technique.
Any trip down the caulking aisle of your favorite hardware store can be daunting. There are dozens of choices. For our purposes today, we will stick with latex or silicone caulk.
Let’s look at how a caulking gun works and how to apply a bead, i.e., a caulk line.
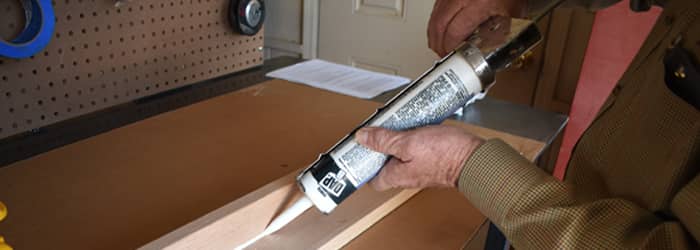
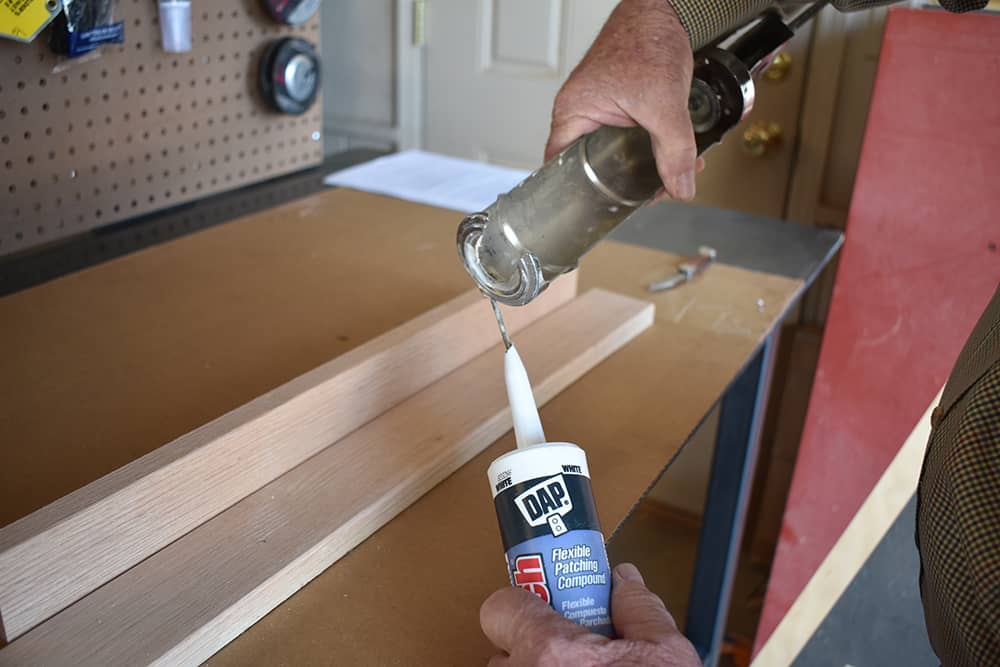
Start by placing the tube of caulk in the barrel of the caulk gun. The gun’s handle-like trigger activates a plunger that pushes the caulking out of the tube. Make a 45-degree cut at the tip of the tube far enough down to leave the opening close to the diameter of the caulking line you want. There is a protective membrane where the tip meets the tube, which will need to be punctured. (I usually use a 16-penny nail from my nail bag to do this).
Now, you are ready to apply the caulk. Once you start depressing the trigger, the caulk will come out of the tip. By depressing the trigger smoothly and slowly, the caulk will ease out of the tube. Quick and jerky movement will cause the caulking bead to bunch up and thin out, making the caulk line less uniform and more difficult to smooth out with your finger.
Technique Tip: Smooth and even motions with the trigger and the gun will result in a cleaner caulking line.
The Caulking “Bead”.
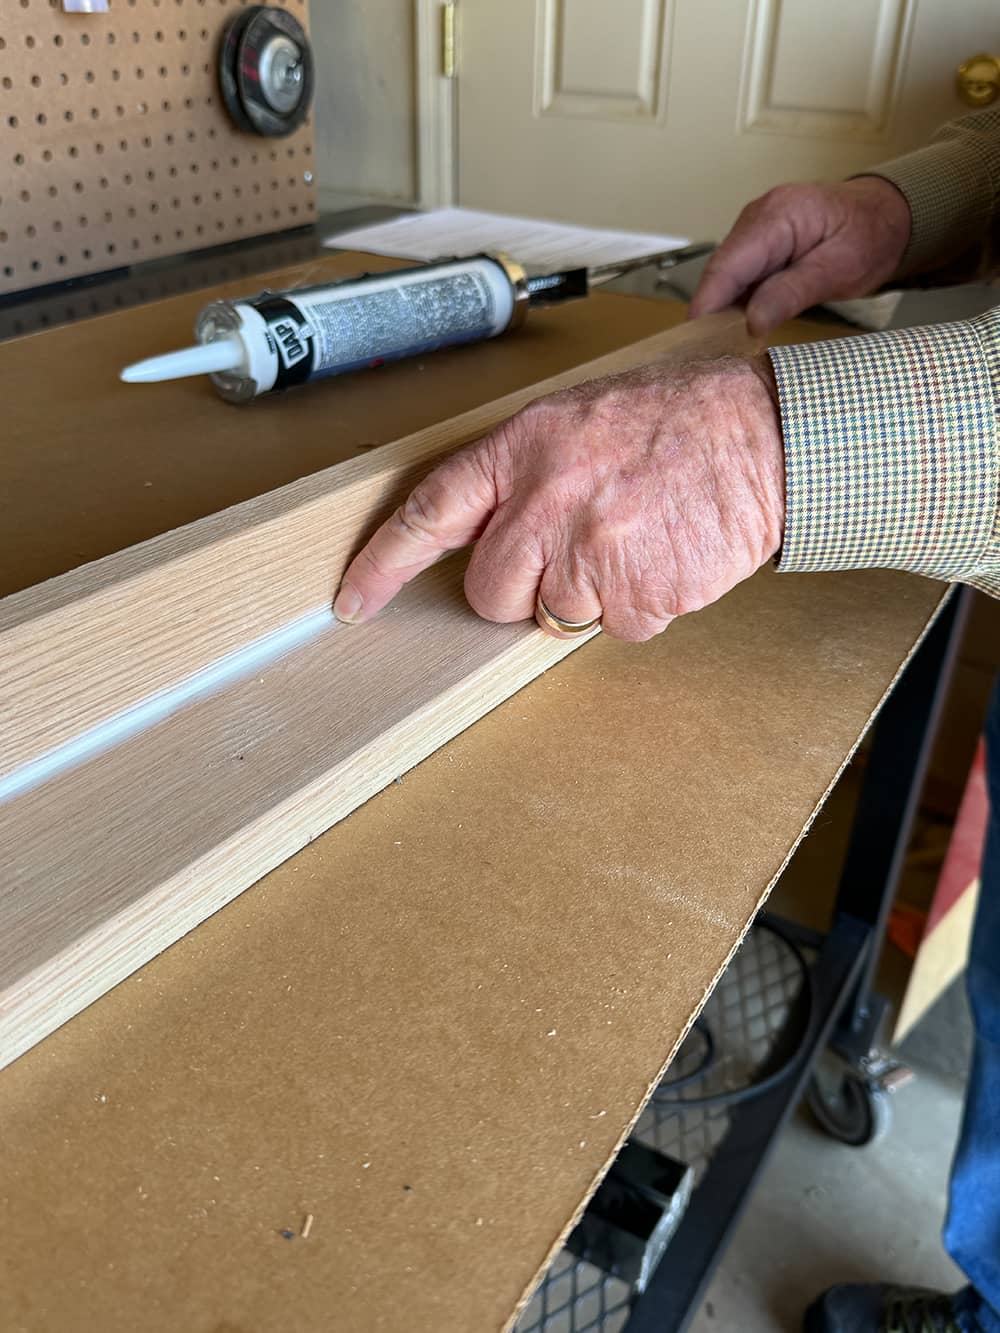
Your first pass with the caulk gun should do the trick of filling the gap you are caulking. Stand back and inspect the caulk line to determine if you need to smooth out bumps. Spread the caulk to fill the areas the bead missed due to uneven gaps or cracks.
Whether you have used tape to guide the caulk or not, smooth the caulk using your finger (with or without a tight-fitting plastic glove) to create an even surface along the line. Keep a damp cloth handy to wipe any excess off your finger (don’t let it build up).
- For latex caulk, water works as an effective solvent.
- For silicone caulk rubbing alcohol or mineral spirits will work just fine as a solvent.
If you have used tape, keep as little caulking on the tape as possible. Remove the tape when the bead is smoothed to where you want it.
Tape Tip: Be sure to pull the tape up before the caulk has hardened. If it has hardened, it will likely come up with the tape when pulled off. This would require a patch or starting over—no one wants that!
How To Store Caulk:
- Put that 16-penny nail back in the tip of the tube before you put it away.
- Release the plunger on the gun to keep pressure off the tube, preventing any “leaking”.
###
Homeowner Handbook To-Do | #Caulking
PODCAST
Homeowner questions include fixing damage to a block fence, insulation, termite damage in stucco, #caulking and more. Plus Dr. Sky discusses the April 8th solar eclipse, where totality will happen in Texas, and what to expect in Arizona.
Podcast Archive With Expanded Content and Resources
PHOTO CREDIT
- Shutterstock/iStock